Post by godo on Feb 23, 2009 2:11:39 GMT -5
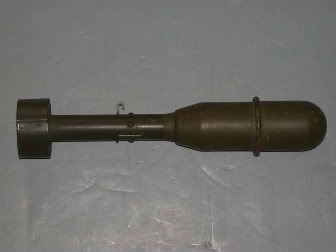
M9A1 HEAT
Rifle Grenade
Rifle Grenade
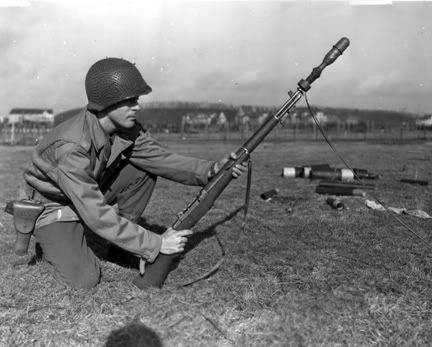
Real Steel History:
The U.S. manufactured 27,292,000 antitank rifle grenades during the span of WWII. The M9A1 was as accurate and effective as the bazooka, but without the range. The M7 launcher attachment for the M1 Garand allowed GIs to lob these at a range of around 300 yards. The M9A1 was a shaped charge projectile that could penetrate 4 inches of armor. They were useful in taking out tanks and pillboxes. The M9A1 antitank rifle grenade weighed about 1 lb., compared to the M6 bazooka rocket which weighed 3.3 lbs, in addition to the bazooka itself.
“The main drawback of the M7 was that it caused a large amount of gas to be tapped off from the operating system of the M1 and into the barrel. While the launcher was attached to the muzzle, the rifle would only function in manual mode. To allow the rifle to fire in semi-automatic mode, the grenade launcher had to be removed from the rifle.” (WW2 Gyrene)
For more information:
www.ww2gyrene.org/weapons_m7.htm
================================================
SUPPLIES:
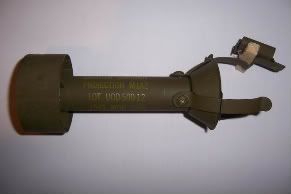
1 - Adapter Grenade Projection M1A2. Commonly referred to as “Grenade Launcher Adapter”. -$20 (gunbroker.com)
1 – ¾” PVC/CPVC Adapter
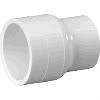
1 - 1” PVC coupling

1 – 1.5” diameter PVC pipe, 7” long

1 – 1.5” drum sanding attachment for hand drill
1 – ¾” drum sanding attachment for hand drill or Dremel sanding drum.
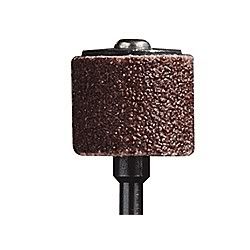
1 – 6” drill extension
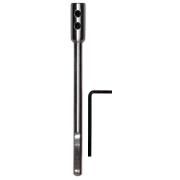
1 – ½” drill bit
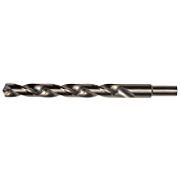
Ordnance Supplies:
1 – MadBull PB4 Airsoft M203 grenade $80 (airsoftgi.com)
1 – Nerf Pocket Vortex Football OR Nerf Ballistic Ball
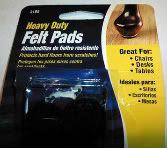
1 – Heavy Duty Self-Stick Felt Pad
1 – M7 Grenade Launcher for M1 Garand $50 (gunbroker.com)
CONCEPT:

INSTRUCTIONS:
1. Take your M1A2 grenade adapter and unscrew the retention tongs and cup which are used to hold pineapple or lemon grenades.
- The screws may be EXTREMELY difficult to work free. Just be patient and use your strength to keep coaxing them. They turn to the left when the adapter is oriented straight up and down or facing away from you. One trick I used was to spray WD40 around the screw heads and leave it overnight. The screw that I had been attempting to work free for a week suddenly was very easy to unscrew.
2. Mark a spot dead center of the top of the grenade adapter. This is where you will begin drilling a hole, so start out slow to make sure it stays centered. Keep drilling until you punch through the bottom. It is about ½” of solid steel so have fun and keep oiling the area to provide good lubrication for the bit.
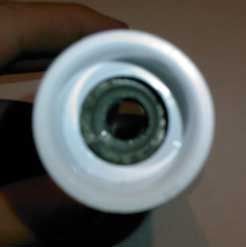
3. Take your ¾” to 1” reducer and check the fit on the ¾” end to the top of the grenade adapter. Using the ¾” sanding drum or Dremel tool, carefully mill out the PVC until the reducer slides right onto the top of the grenade adapter.
4. (OPTIONAL) Now use your measuring skills to mark where the screw holes are on the grenade adapter compared to the PVC reducer. Drill out these holes and use the screws to secure the reducer to the adapter.
*IMPORTANT* This needs to be very precise, because if the reducer is screwed in crooked, the whole thing will be crooked and your aim will be way off.
- Alternatively, you could now use a putty to permanently secure the reducer to the adapter without worrying about the screws. However, I wanted to be sure that the adapter wasn’t a total loss in case the rest of the unit broke during a game or something else. You can always re-fabricate the upper half since PVC is cheap.
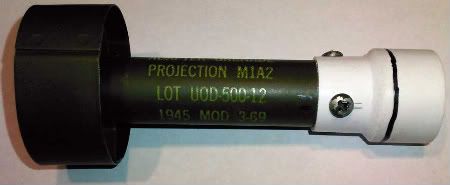
5. Now comes the hard part. Attach the 1.5” drum sanding bit to your drill. Use the roughest grit possible. Position the sanding drum ¾ of the way onto the attachment. Now tighten the nut on the attachment so the sanding drum is exceptionally secure. Having the extra portion of the sanding drum sticking out will act as a gradient and aid you in the milling process. Take your 7” long, 1.5” diameter PVC tube and begin slowly milling out the center of the PVC tube. If you have a drill press, you’re lucky because this part takes FOREVER. Once the drill has worked it’s way in enough you can crank up the speed and go to town on the PVC.
*WARNINGS*
- The PVC will become extremely hot due to the friction involved. Don’t burn yourself holding the tube, and be careful the tube doesn’t warp. Also be mindful you don’t burn up your drill.
- When the PVC heats up it will also become “sticky.” My drill jammed many, many times inside the tube. Using a rougher grit of sandpaper can avert this somewhat. Just be careful and go slowly. Forcing the drill down into the tube to work faster is a guaranteed way of jamming the bit, and then you will have to spend time freeing it up, probably destroying the sanding drum in the process.
- We all know PVC is toxic in its liquid form, so just be careful about breathing the dust and use a mask.
5a. When you’ve gone as far as you can go with only the bit and the drill, attach the 6” extension and keep working until you are less than 1” from the other end. Drop the PB4 down the tube to check the fit. It should drop down less than 1” from the other side.
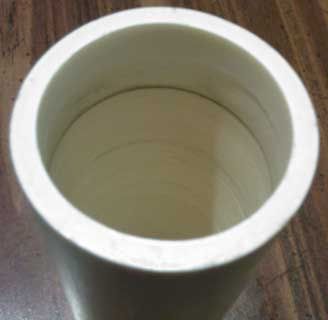
5b. Use a high grit, fine sanding drum to polish up. It’s almost impossible to make the inner tube completely smooth, but it helps even out the scratches from the low grit drum.
6. Take your 1” coupling and cut it in half using the tool of your choice. Try to make the cut as even as possible. Sand the remaining piece by hand to deburr it and even it out if there are any ridges where you cut it. Sand around the exterior until it fits snugly inside the un-milled end of the 1.5” tube. You can now use PVC glue to secure the coupling to the 1.5” tube. Tap the coupling in until it is flush with the end of the tube.
7. Shaping – Mark a line 1/8” above the flair on the reducer. Use a Dremel or sanding bit to smooth the flair until it becomes flat or slightly curved between the beginning of the flair and your line. Mark a line 1” above the end of base of the tube and coupling you just joined. Carefully shape a gradient from the base of the tube to the line. Use pictures of the real steel version for reference.
Now glue this unit to the reducer to get one solid piece.
Cut a 1/8” ring from a 1.5” coupling to get the ring that is on the mid-section of the RS version. Glue it halfway between the top and where the tapering begins.
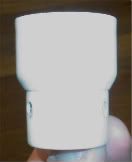
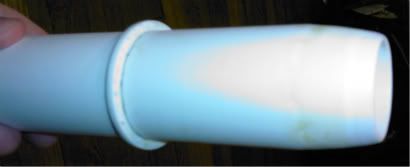

8. Paint it up, you’re done!
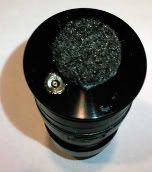
9. Add the self-stick felt pad to the bottom of your PB4. I’m not sure if this is necessary, but I didn’t want to chance messing up my 203 shell, so the felt pad acts as a bumper to soften the blow of the BB, and so the BB doesn’t shatter. You can cut it to shape if desired. I need to test to see if matters or not whether it’s perfectly cut to the size of the button on the 203 shell.
9a. You will probably need to add electrical tape to the PB4 so it doesn’t rock back and forth inside the tube and stays nice and even with the walls so you get good accuracy.

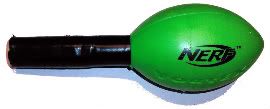
10. To modify Nerf rockets to fit the PB4 tube – Cut off the fins, and wrap the stick portion in electrical tape until it stays securely inside the tube of the PB4. You may need to use a saw to cut a small portion of the stick off if you want the football end flush with the tip of the PB4, but it is not necessary.
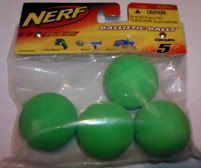
10b. This device can also accept Nerf Ballistic Balls which fit snugly inside the milled out PVC tube.


================================================
Finished Product:

================================================
Notes:
- The diameters involved in this project almost perfectly match the RS version.
- The length is going to end up at about 1.5” longer than the RS version.
- I have not done a range or accuracy test.
- You can get a decal for the lettering from alliedworkshops.com or make one yourself.
- The best thing is this will also fit on the barrel of your M16/M4! So you can use it in modern games. Impress your friends, frighten your enemies!
- The large tube of the PB4 is ripe with possibilities for custom ammo – imagine lobbing a cartridge of bbs that bursts when it hits the ground. Many options will have to be explored.
- I still need to do the gluing, shaping and painting to finish up this project.
FIRING TEST:
.2g Biodegradable BB
64.3'F
Tokyo Marui M4 280fps
Green Gas
In each successive test the M203 shell was charged with 1 more second of Green Gas.
| Charge time | Result | Notes |
| 1s | OK | |
| 2s | OK | |
| 3s | OK | BB chipped |
| 4s | OK | BB chipped. Felt pas has hole down to the metal. |
| 5s | OK | BB chipped |
| 6s | OK | BB chipped |
| 7s | X | Shot 1- failed. Shot 2- 1 second delay before M203 popped. BB chipped |
| 8s | OK | BB chipped |
| 9s | OK | BB fragmented. Felt in poor condition. |
| 10s | OK | BB fragmented |
In all occurences, the pieces of chipped BBs were found inside the M9A1 unit and not the barrel of the weapon. Following the entire test, the barrel was checked and no fragments were found inside. I assume that the biodegradable BBs are more fragile than regular BBs.
- Please post feedback! I should be finishing this project up in the next couple of weeks.
 Hope you enjoyed it!


