|
|
Post by kalashnikovkid on Jan 18, 2011 14:16:08 GMT -5
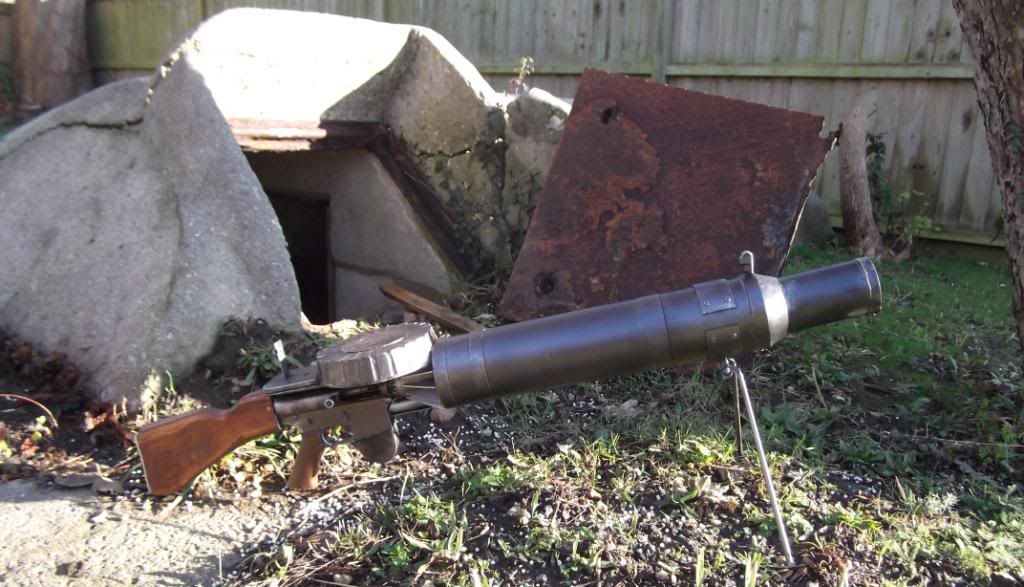
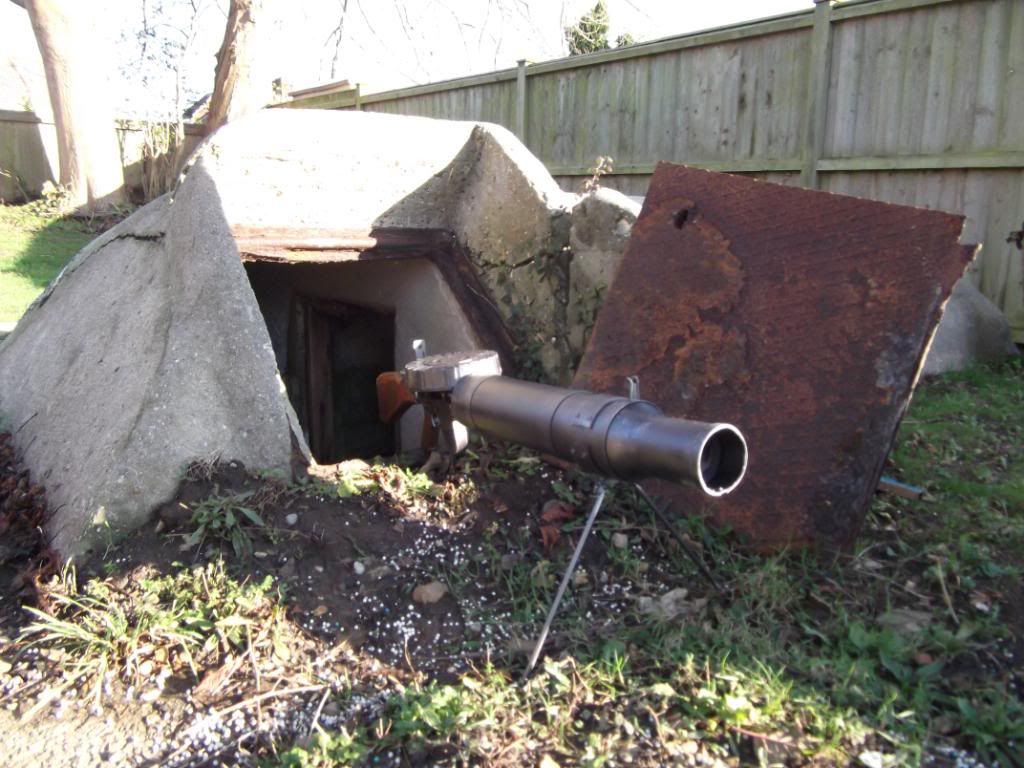
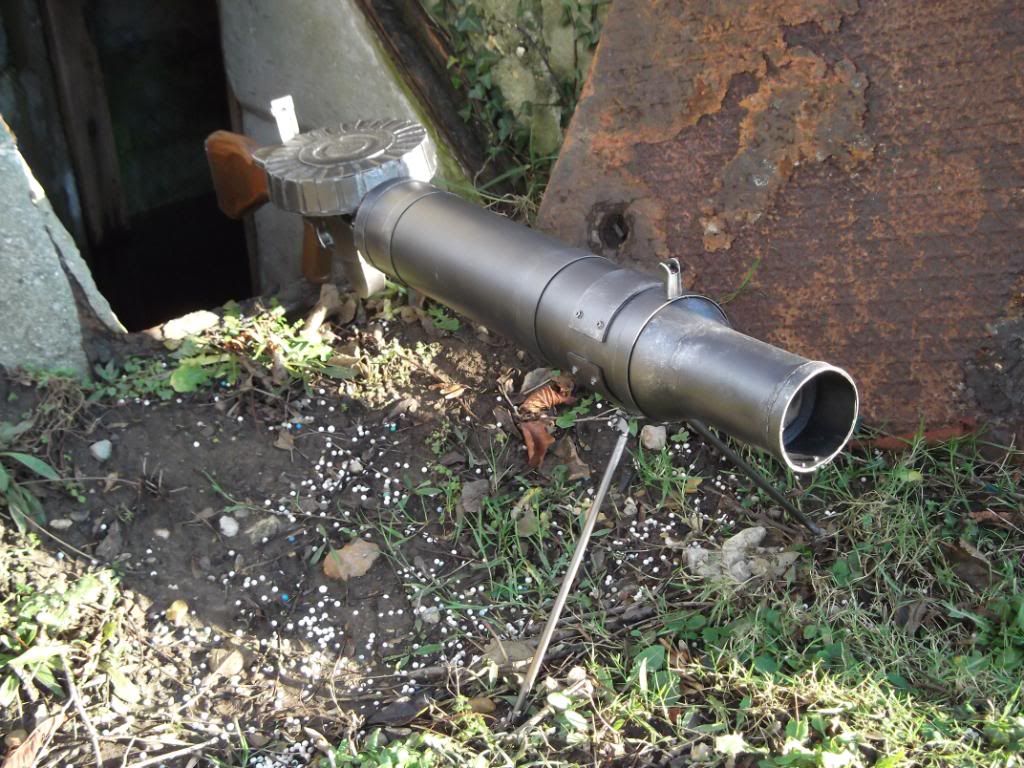
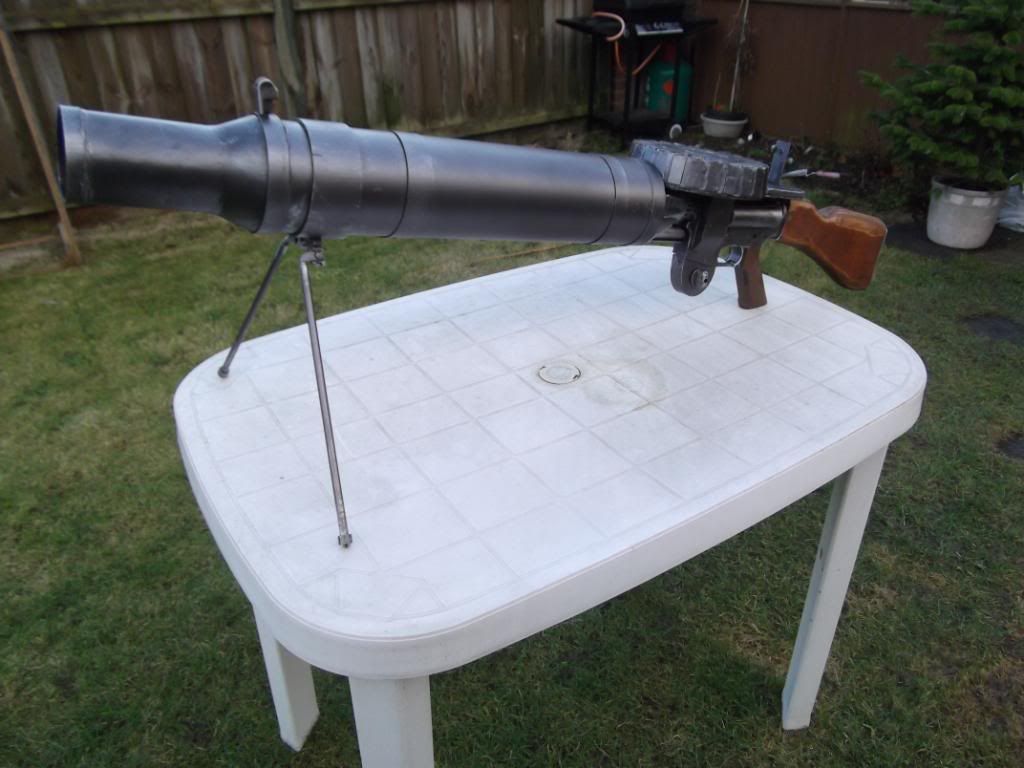
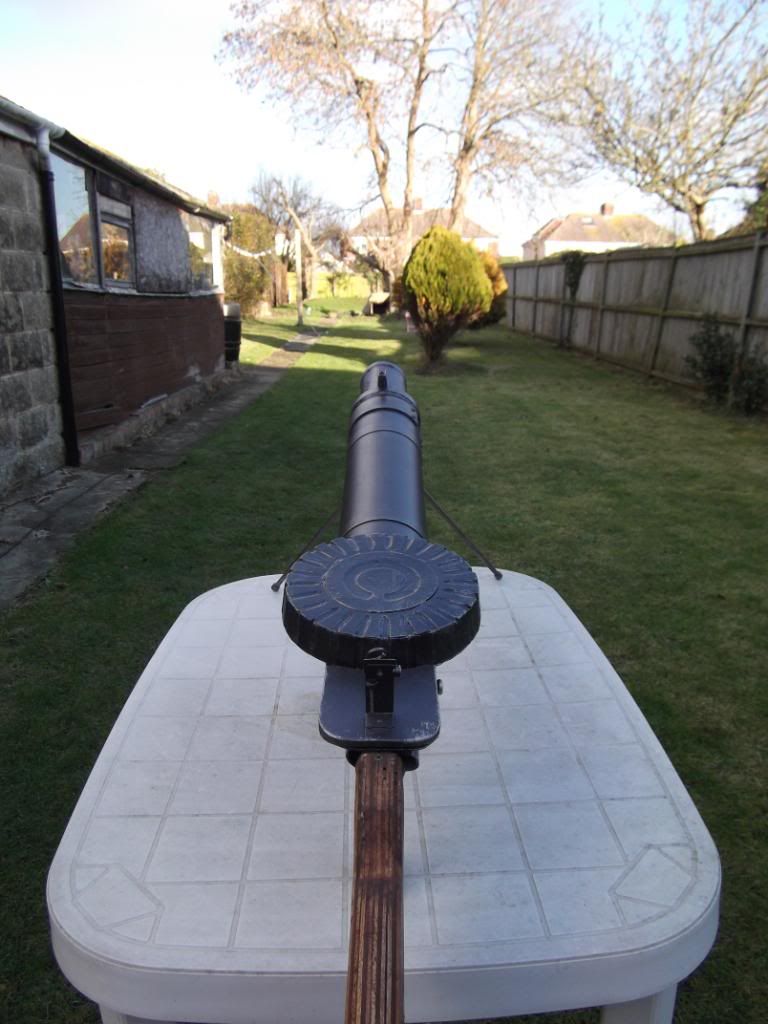
As per my Mp40 build this project has been posted on UK forums for a while (as i built it) now it's complete I'd thought I'd share the process. Please bear in mind it's cost at most £30 to build (not including base gun) so don't expect CNC work  sorry if the post's seem a little out of joint, it's a copy and paste job  Here we go (it's a long one).... Evening everyone, I'm just getting into WW2 airsoft thanks to Josh at Gunman. My team got into nam softing (thanks again to josh) last year and now we wanna go one step further back in time. Due to financial reasons we're going to do a french resistance load out. For the most part the weapons are easy to source, problem is our support gunner needs a gun so we've gotta build him one. Now thing is it had to be one man portable. That wrote off anything on a tripod. It ended up as a toss up between a Bren or Lewis gun, as per the title you can guess which one I went for! Now before I start I must point out that I lack any tooling more sophisticated than a dremel, power drill and hand tools. Also I'm trying to use as much found material as possible to keep cost down. Righty, less talk more pics... Front endSlightly out of spec with regards width .5in wider and the angle of the taper is quite steep, but hey!  Made from and old SIG water bottle, desk lamp head and some waste pipe ReceiverGone for an AR15 receiver as it's what I had. A g3 would look better but I didn't have one to hand and cost is an issue  cut down VN high cap will provide ammo feed (more details later) 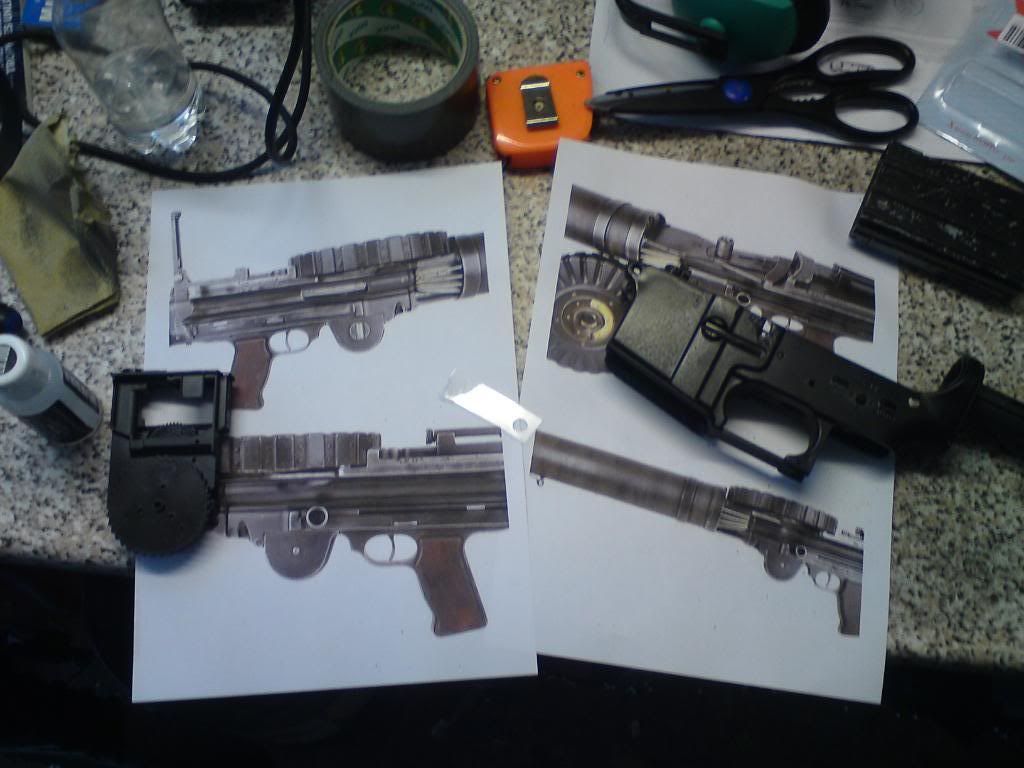 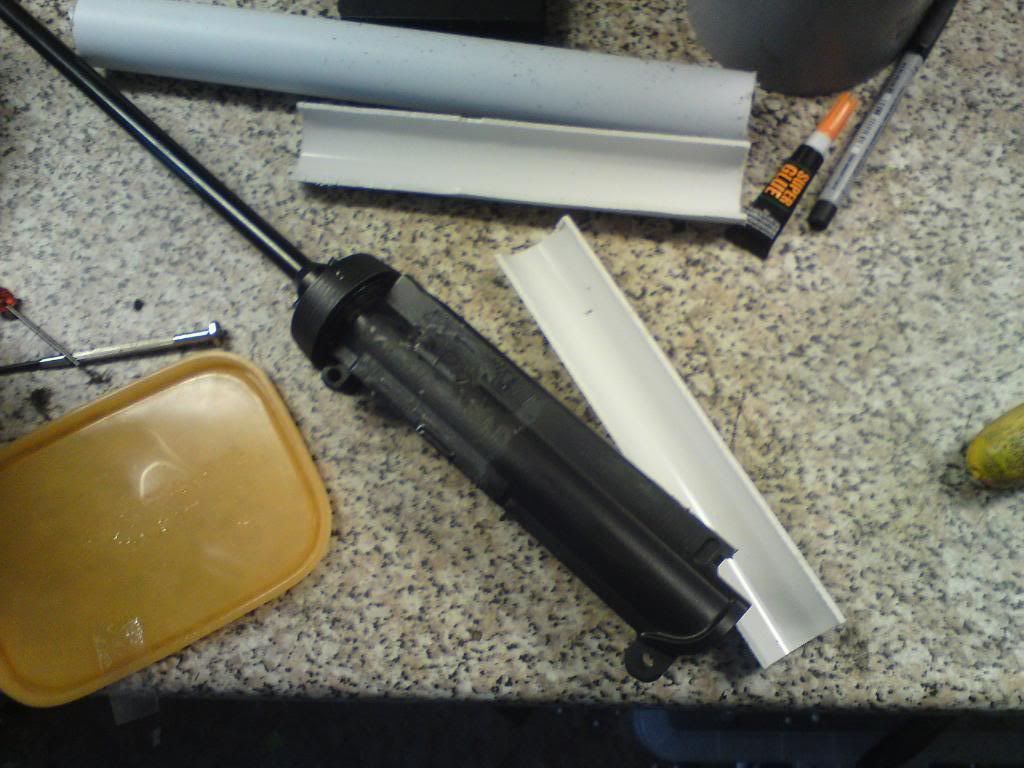 Pistol grip Pistol gripArmalite grip sanded and spayed for the woodish look  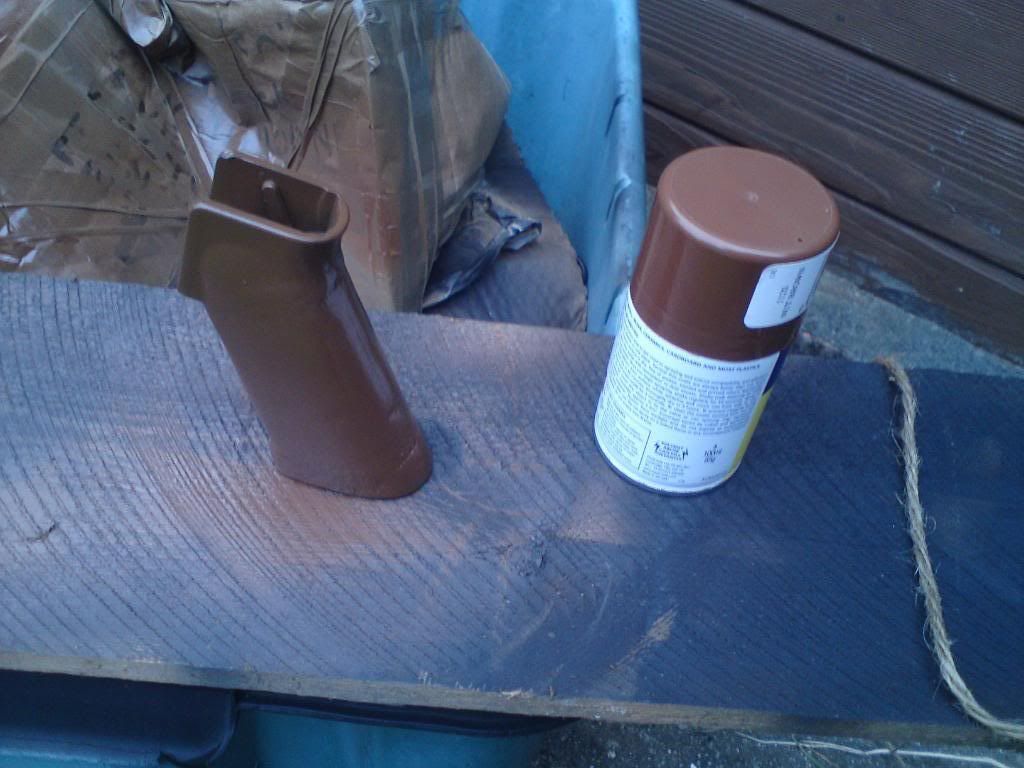 And together 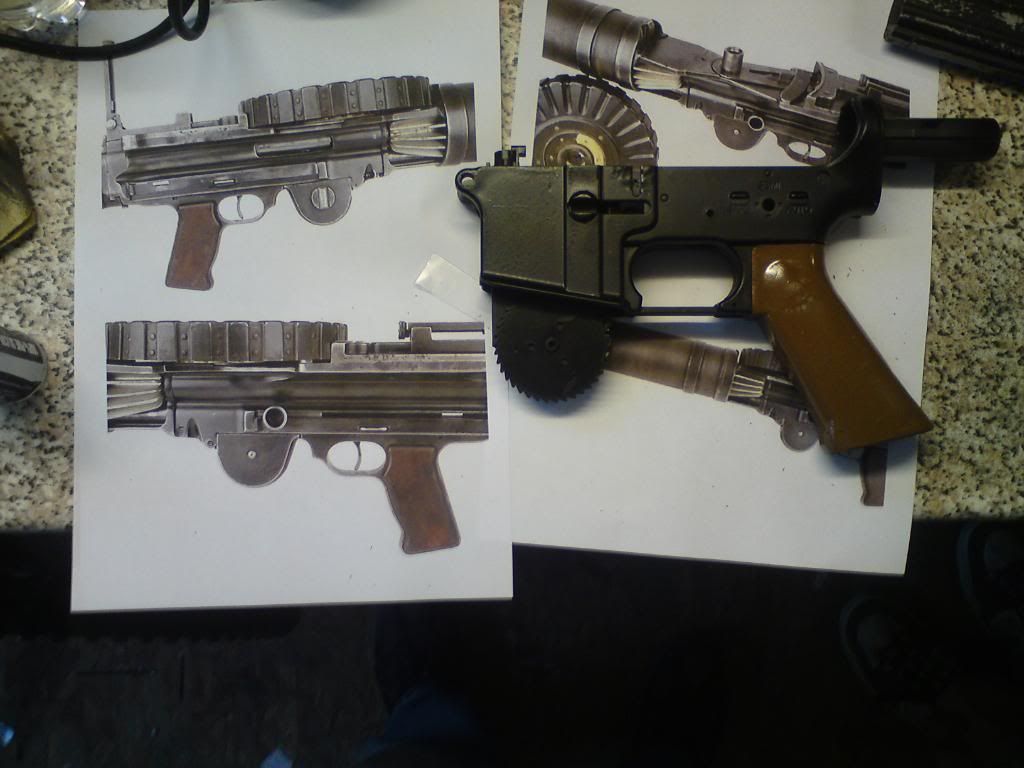 quick mock up with an old stock to get a feel for the whole 50" that is a lewis gun! 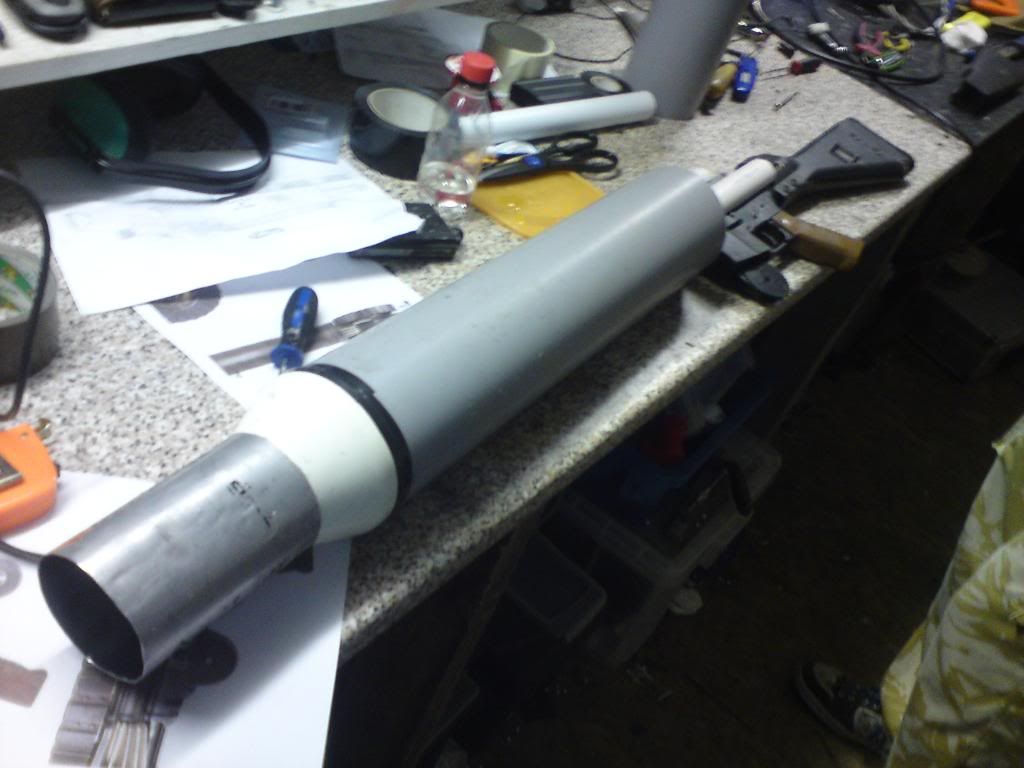 Gonna cut the barrel bands and heat sink fins tomorrow, will have more pics soon  |
|
|
|
Post by kalashnikovkid on Jan 18, 2011 14:17:15 GMT -5
Sorry for the delay, found the plastic i was gonna use had hairline cracks in it so was no good. Moved onto the mag shell... Mag is a disk 8" x 1.25" I wanted to make it out of an existing item rather than scratch build which led me to a 8" cake tin! Tin (rim removed)  looks more flared in the picture than in the flesh. only about 1/4 inch between top and bottom radius Other way up  Printed and scaled a engineers drawing of the 97rnd drum, mines a 47. only difference is height and addition of a leather loop. Image has been glued to some 1mm HIPS to act as a template.  more to come soon... |
|
|
|
Post by kalashnikovkid on Jan 18, 2011 14:18:54 GMT -5
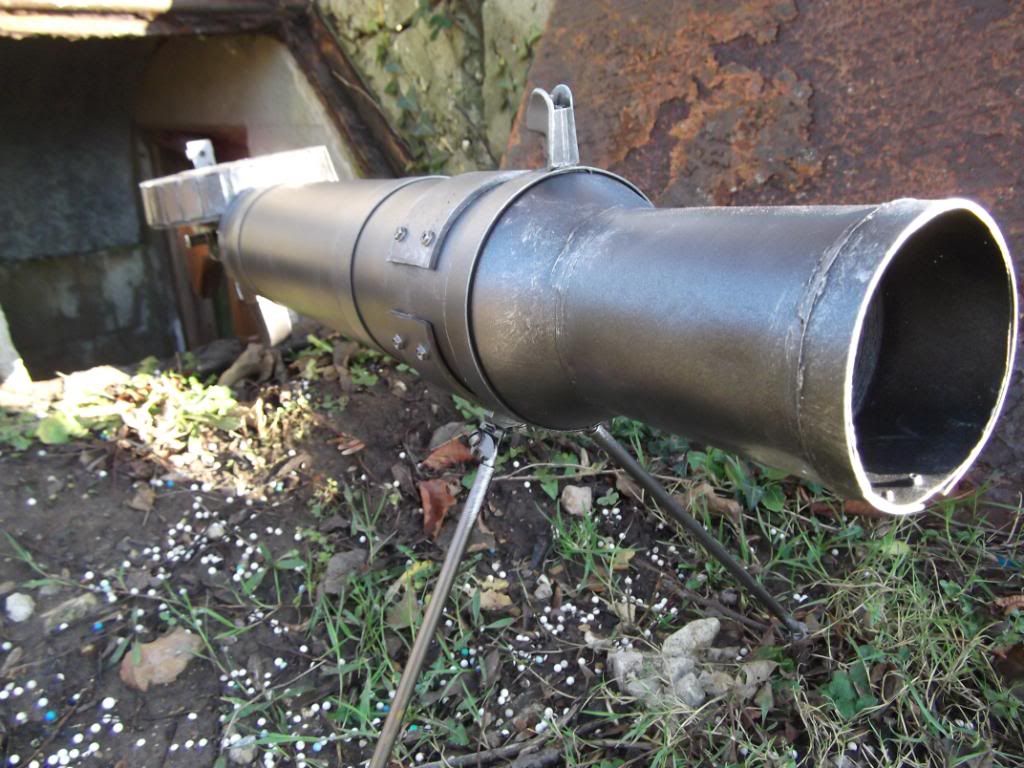
Bit more done to the mag. Needs a trim and filler to smooth the contours and look like stamped metal.  Righty ho gent's got a couple more hours in on the old lollipops . It now fires (very loudly!) at 320fps and managed to get the front end on temporarily. Still need to expanding foam it for strength. Time for some pics... Got a JP/bush master front end thing out of the spares bin. It's perfect as a internal base for the heat shield...  Sorry for the crappy pic! Added foam spacers to centralize the heat shield and my own version of the Madbull ultimate sound amp thing made from a pop bottle and a cut down M249 mk1 flash hider. Ugly as hell but is hidden by the heat shield and REALLY works. Receiver is starting to take shape with the addition of cut down tubing on each side.  Heat shield added to test fit. Found out that the pop bottle needs to be longer (500ml type) to fit properly with front end dimensions. Will be changed before foaming.  Dangerous end showing amplifier cone, please not that the jagged white area is in the process of grinding down, and yes that's duct tape wrapped round! Outer edge is quite beat up but the whole gun is getting abusive ride on the weathering train when it's done   A few scale shots, it's huge!... Our support gunner holding it. He's 5'10" ish  Against my M16  And finally some more mock ups with the un finished mag and temp stock....    Need to tweak the dimensions a little to get the length right. The front end needs to move away from the body to accommodate cooling fins and I need to start on the stock next I think and fill and sand the mag shell. She's looking pretty darn rough atm but we're getting there slowly... |
|
|
|
Post by kalashnikovkid on Jan 18, 2011 14:19:44 GMT -5
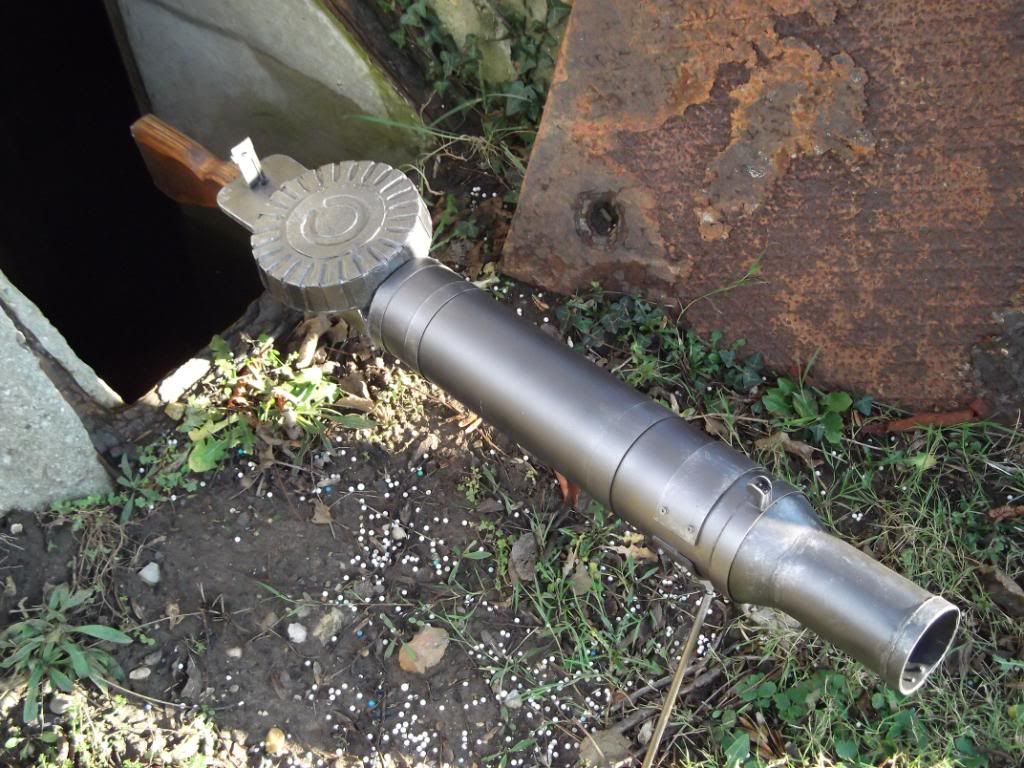
Got the mag back from the fiberglasser (my mate Matt) and got my support gunner Rob to fill and sand the mag to give it a more pressed steel look. Then I got some 1mm HIPS sheet and started to make the barrel bands  Strips are screwed at the join underneath and glued on.  After 2 coats of primer and the first of 3 colours (Black, Pewter, Silver) applied   Started on the feed channel for the top mounted mag. 2mm polycarbonate epoxy'd in place. Quite proud of the receiver but it shouldn't look to bad when in play. Also note it stops in line with the split body. Want to keep the tip up feature of the AR for cleaning and repair.  Started the case that the hicap internals will sit in. Trying to replicate the "hump" on the Lewis as closely as possible. The Allen bit is there as part of the wind key I have planned. 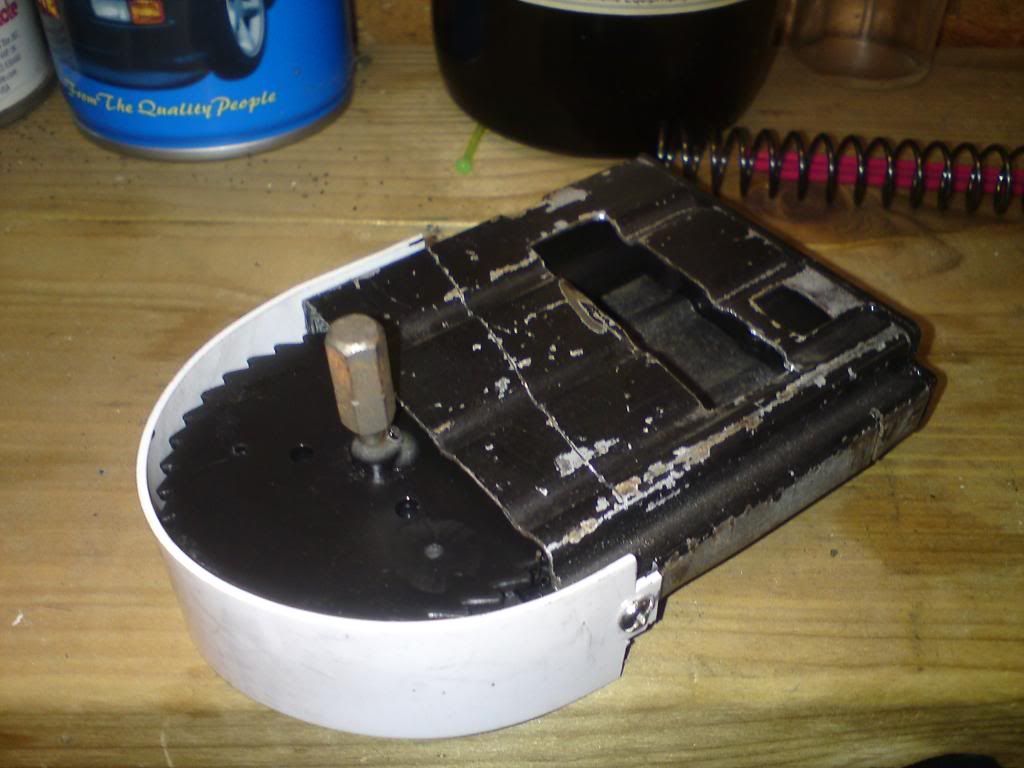 The cut out lines up nicely with the receiver and is 40mmx10mm for reliable feeding i hope   Also made a start on the fore sight. It'll be disguised nicely with body filler and plastic sheet   Choppy chop  |
|
|
|
Post by kalashnikovkid on Jan 18, 2011 14:20:43 GMT -5
Added the sides to the wind mech. Need to put a small winder on the Allen bit. gonna leave a small length of it exposed for quick winding in the field (electric screwdriver!)  Inside the mag well. just to show the ammo chute  Upper chute and polycarbonate receiver top. Using m4 pan head allen bolts and glue where permanent joins are needed and just Allen bolts where access is required.  And with hicap in, may pack out the walls with plastic for extra width. 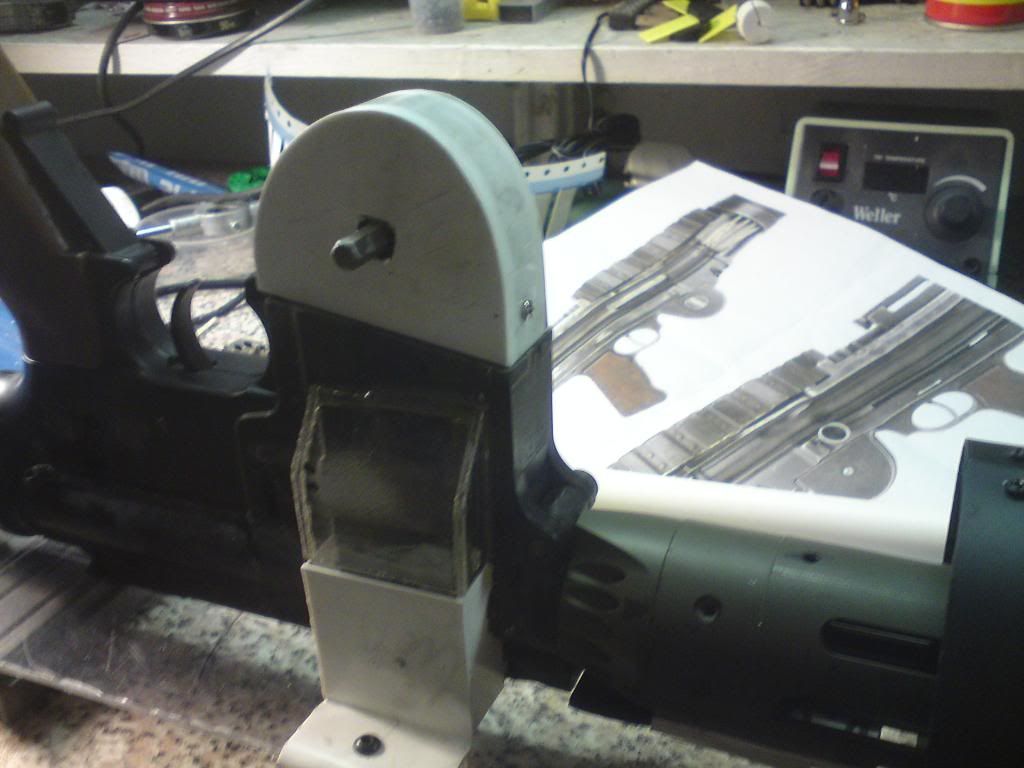 Inner mag shell. This will form the body of the hopper, the tin shell is just a lid. The base of it is made from 2mm polycarbonate with 1mm HIPS as the ramps. 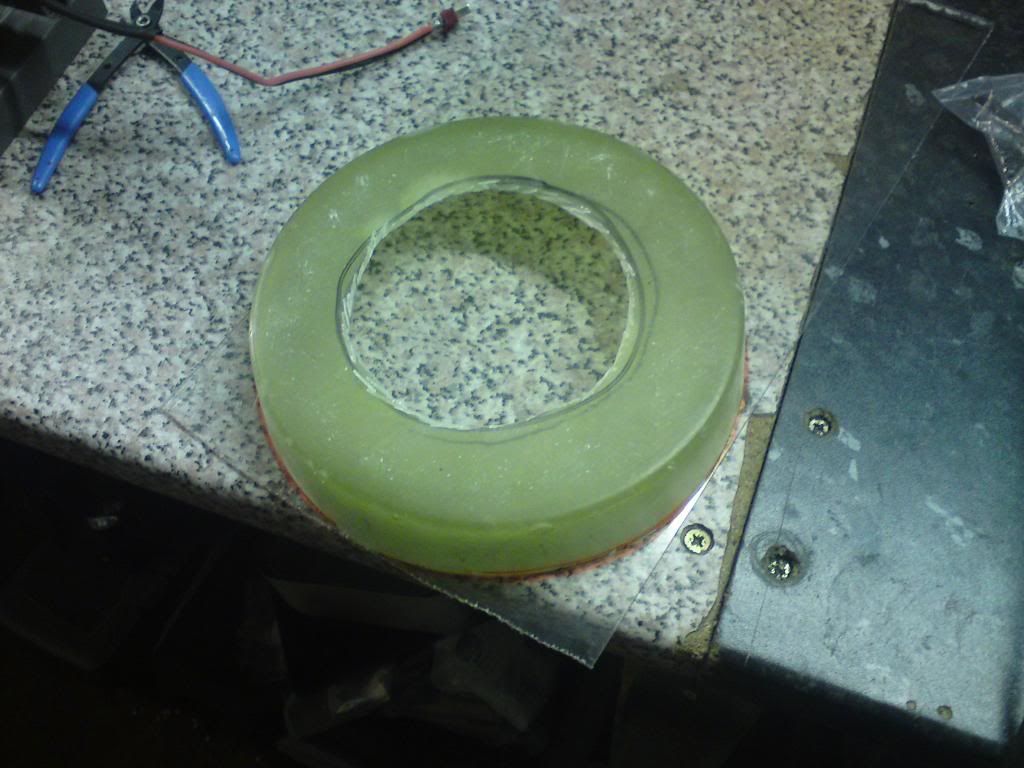 Rough cut base mounted on the receiver for measuring, 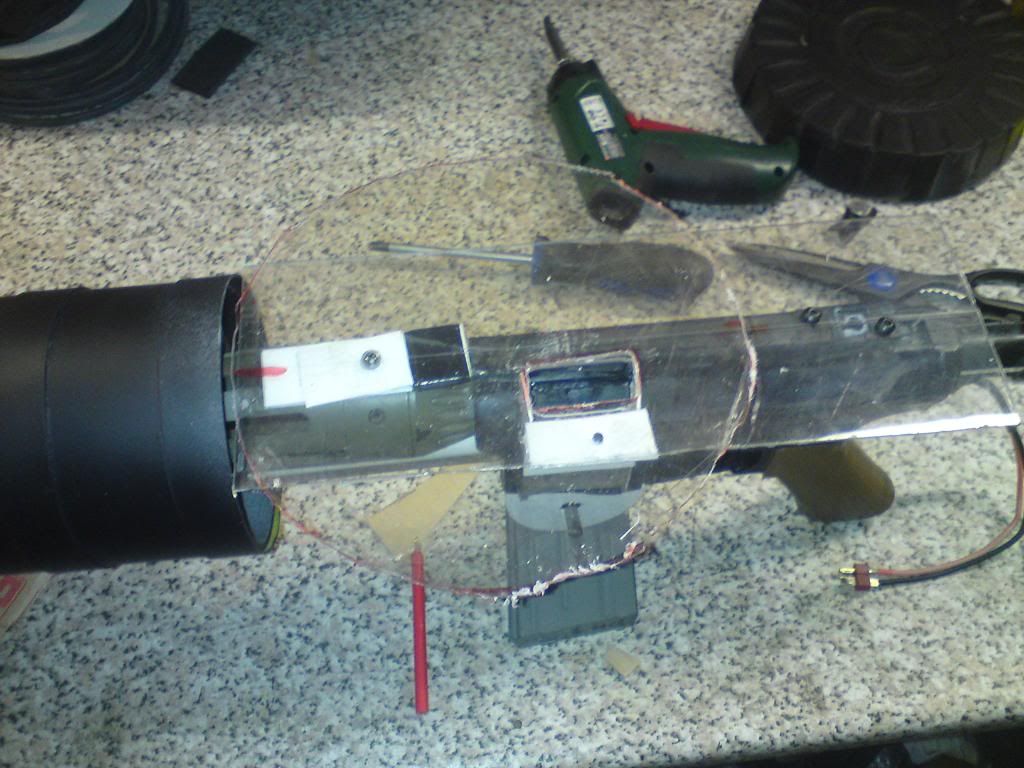 Added a gas tube and lower bracket. This acts as an anchor point for the outer barrel. Removable with 3 screws for easy take down. 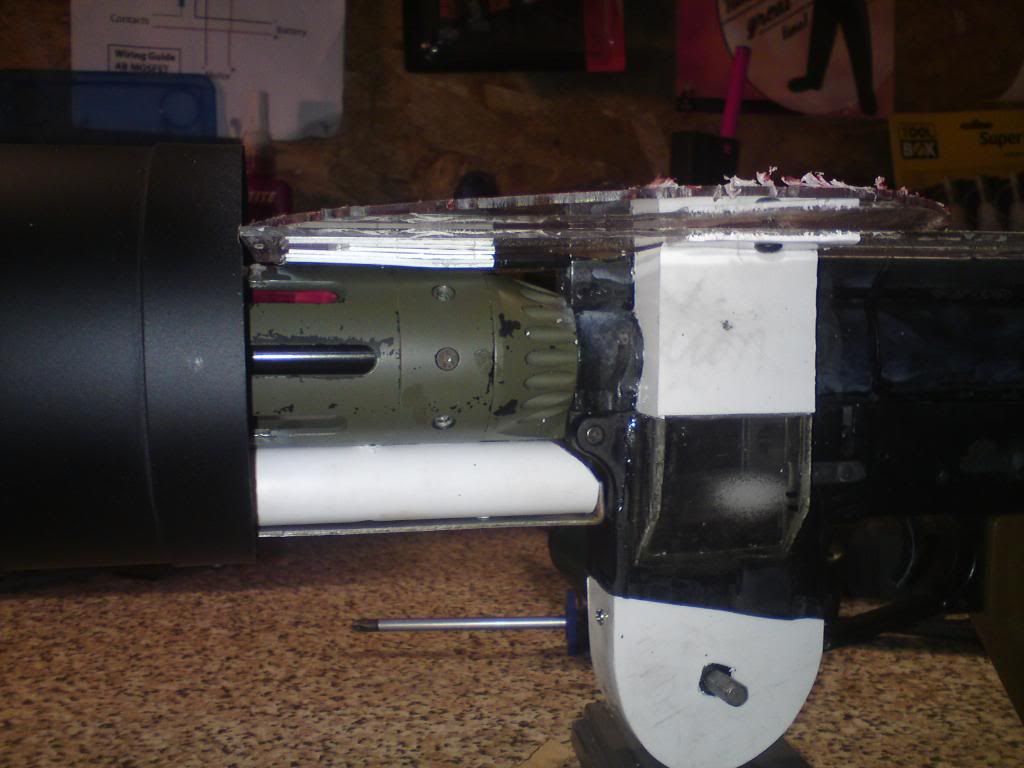 Mag internals now all in place. Two shallow ramps act to funnel rounds into the chute. First tests are good. shot ~1000rounds in one hit and didn't have any feeding problems. Only a few rounds remained in the hopper at the end 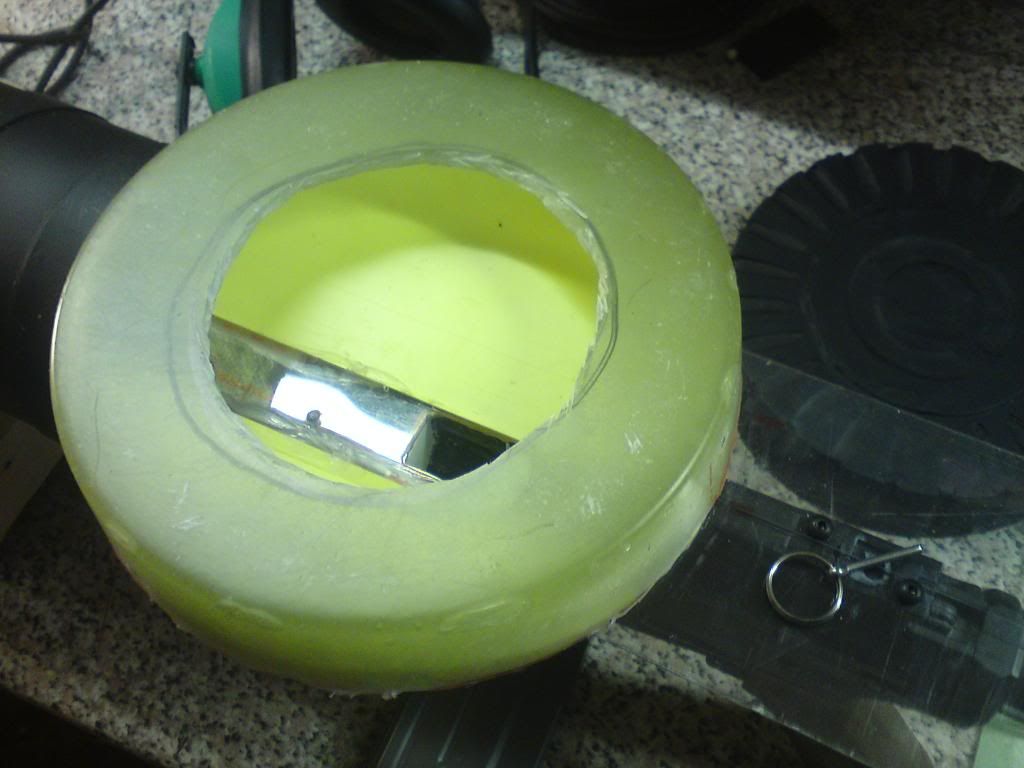 With the lid on 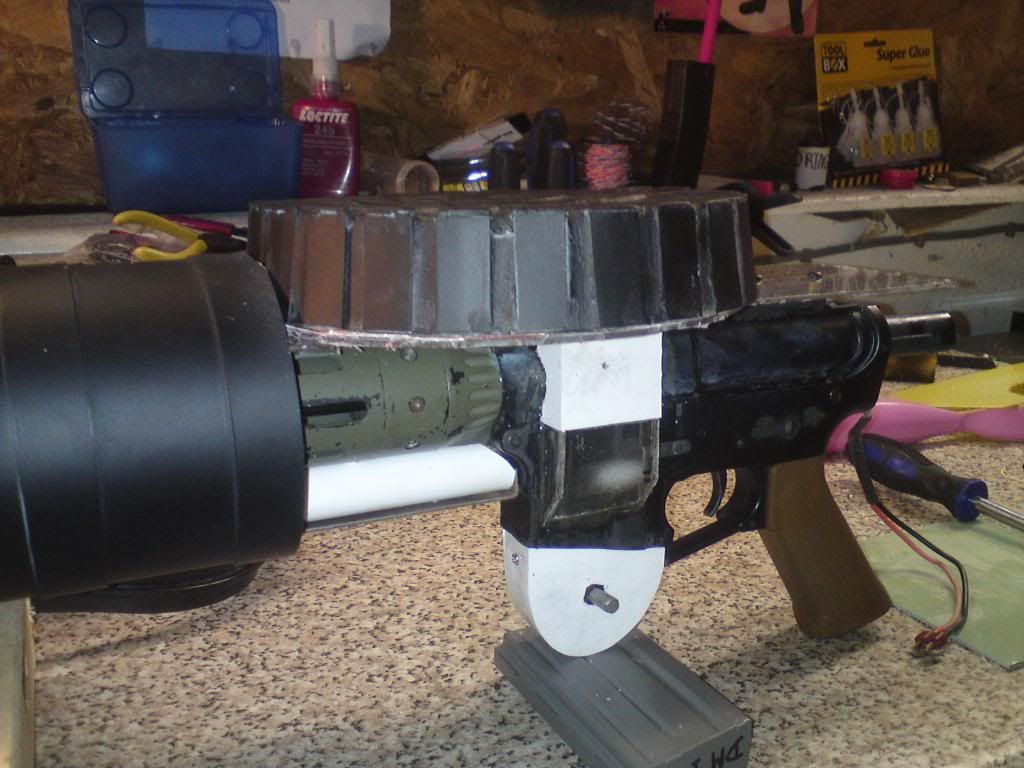 lid is held in place with a split pin. Works really well 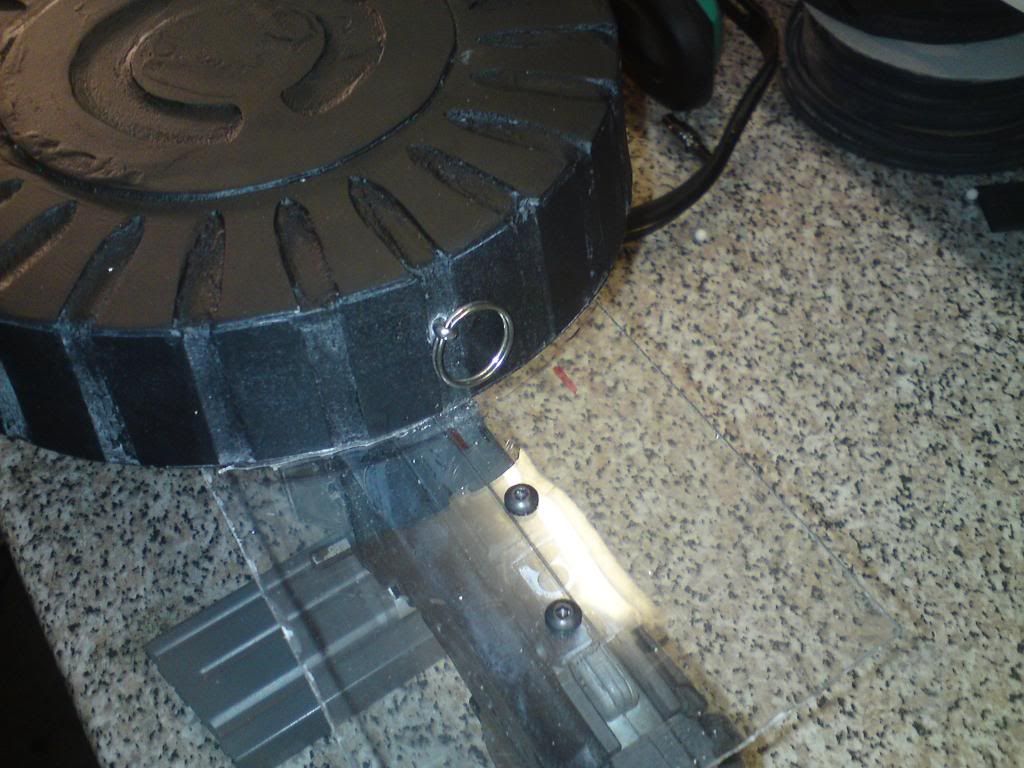 So far I'm really pleased with the progress, saying that it is at the crappy looking stage atm. It NEEDS a damn good painting soon but I still have loads of receiver details to add first. Off to town today for paint glue and expanding foam. Will add more later today if possible |
|
|
|
Post by kalashnikovkid on Jan 18, 2011 14:21:27 GMT -5
Did some more today. Only had an hour of so to work on it today (with the help of Rob) Anyway, Time for today's update  Started on the stock. Scale up a picture (in my case an engineers drawing) and make a template. Copy 4 times onto 9mm ply, like so  Get your mate to cut it all out by hand!  then make a space for the battery in two of the pieces.  Check that the battery fits!  Then pin and glue it together.  Battery compartment  and with battery in place.  Once it's all dry it's going to take one hell of a lot of dremeling to get the rough shape then a good few hours of sanding to get the desired shape. It'll be worth it tho, looking forward to getting it mounted and making the but plate  Also did some front end work but that's still in progress and I'll post when it's done. |
|
|
|
Post by kalashnikovkid on Jan 18, 2011 14:22:12 GMT -5
Did the fins today.   could be better but I'll look at improvements later. |
|
|
|
Post by kalashnikovkid on Jan 18, 2011 14:22:57 GMT -5
Rob and I shaped the stock today with a rasp and power sander. Then gave it some stain and a coat of linseed oil. I've temp mounted it for photo's and general cool looks. Will make a nice solid mount soon. Stock mid shaping 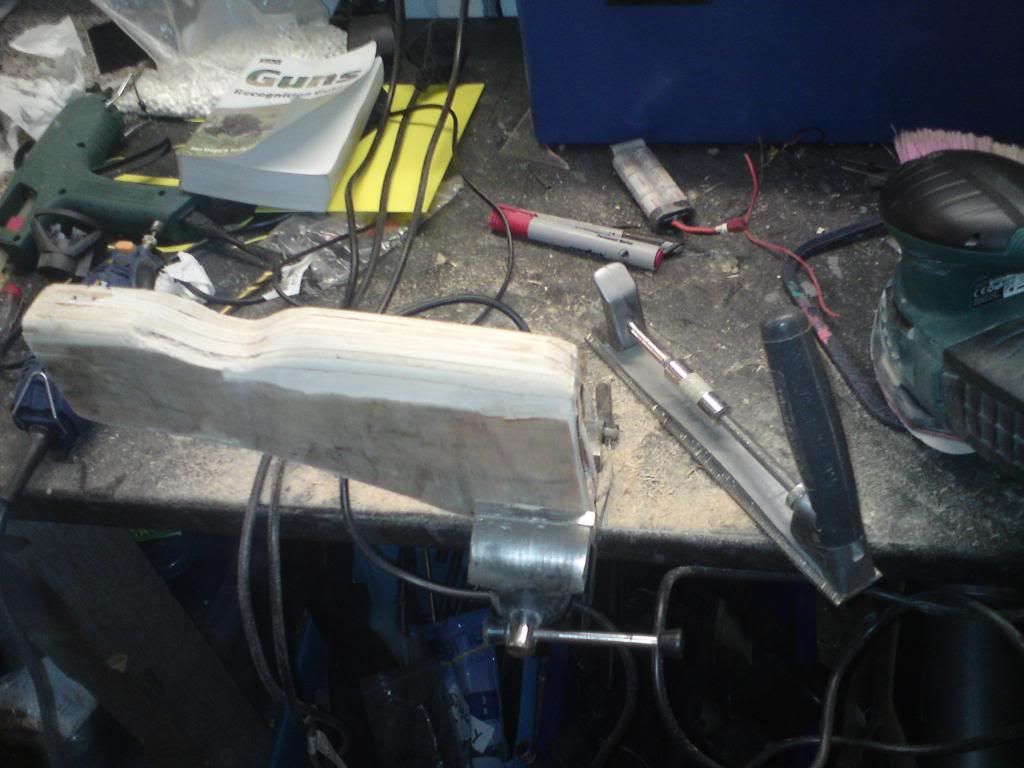 Stained and oiled 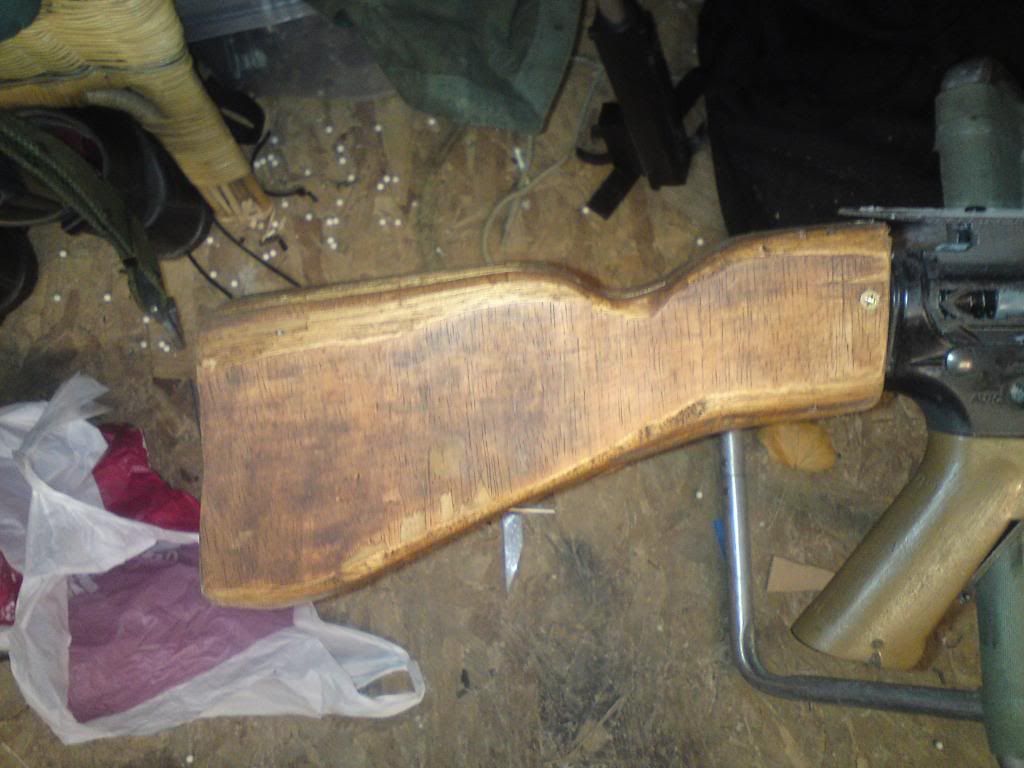 All together 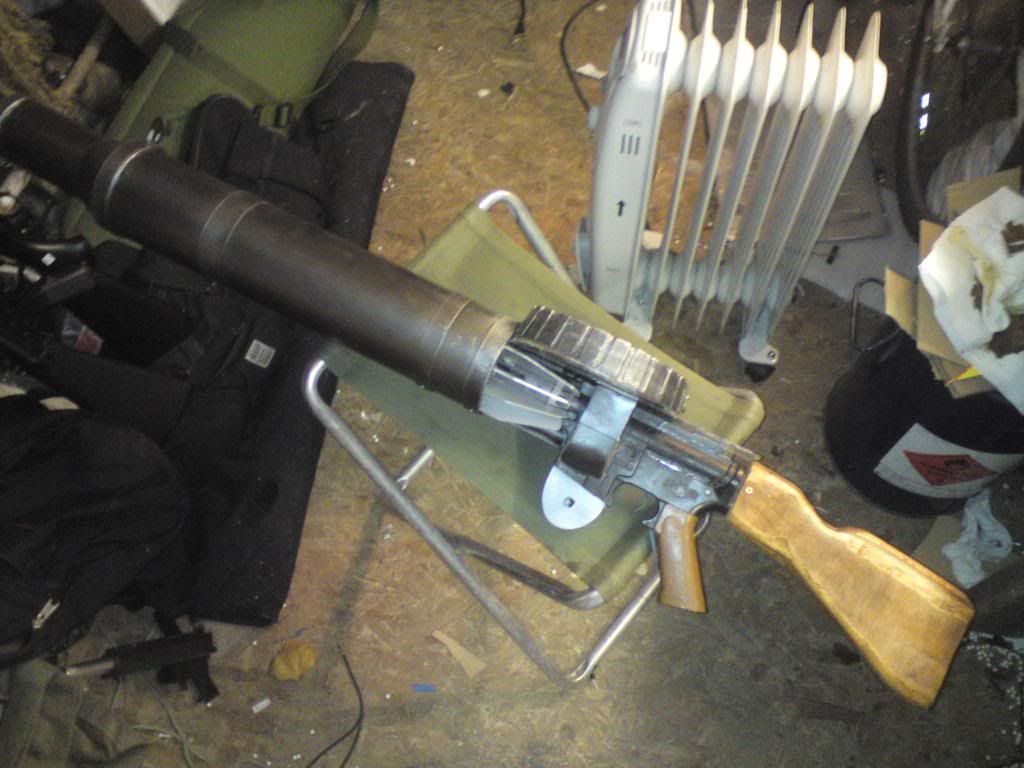 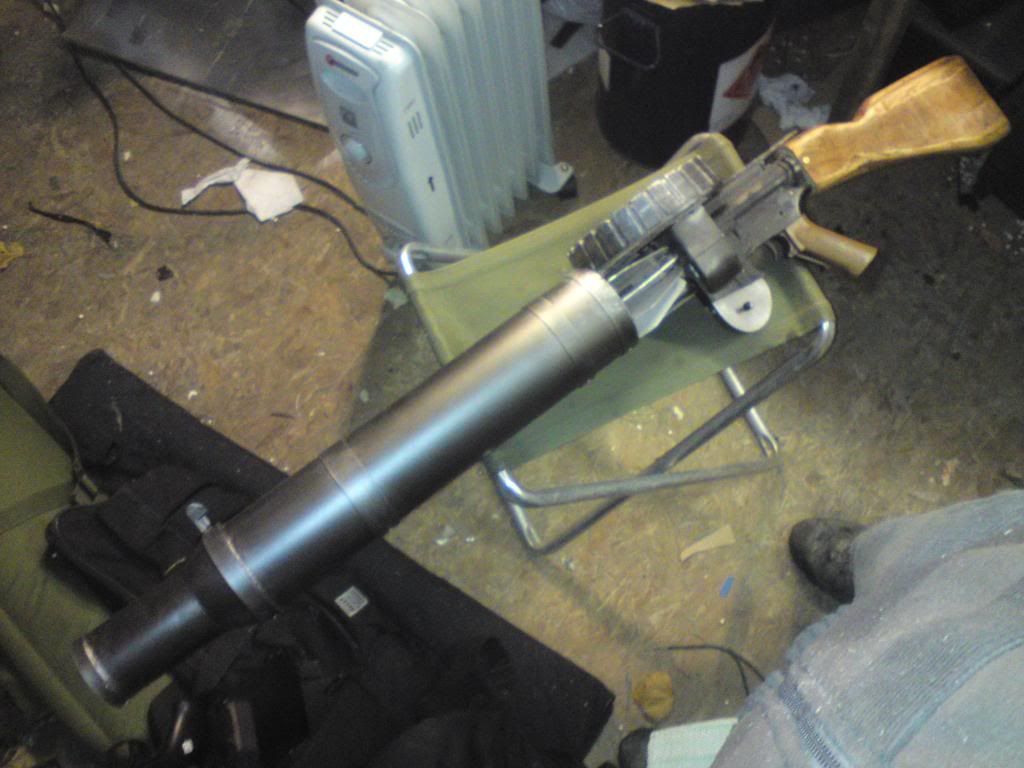 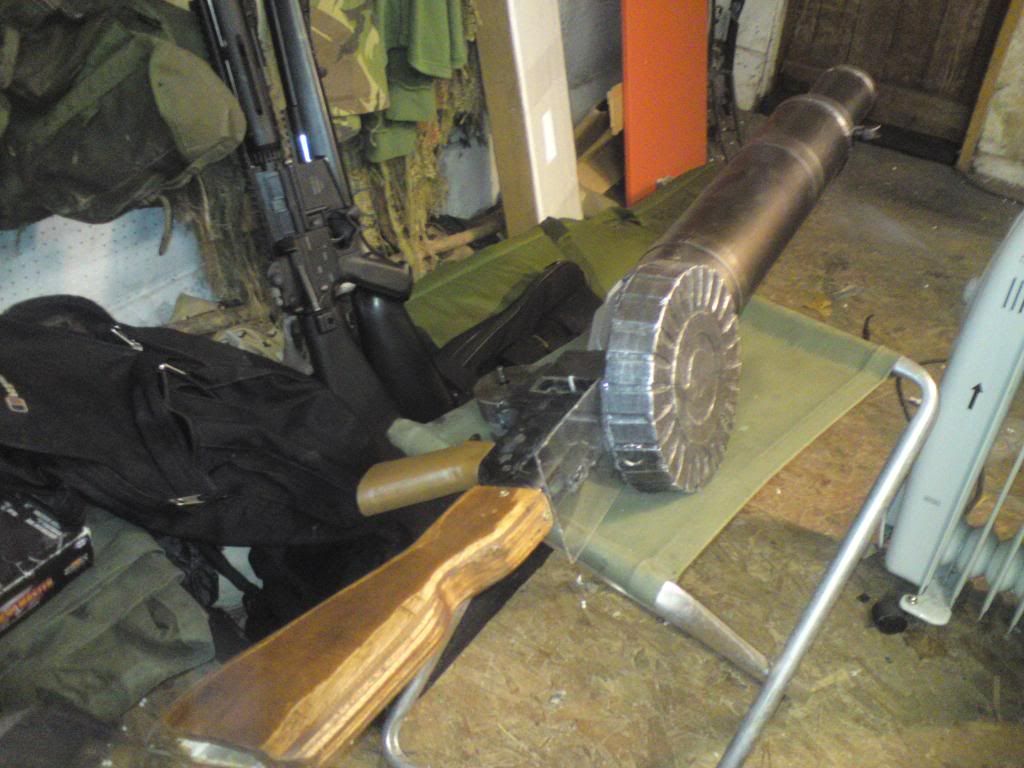 I'm 6'7" and this 50inch monster still looks big on me! Sorry for the face, I can't help it. It's so freaking sweet!  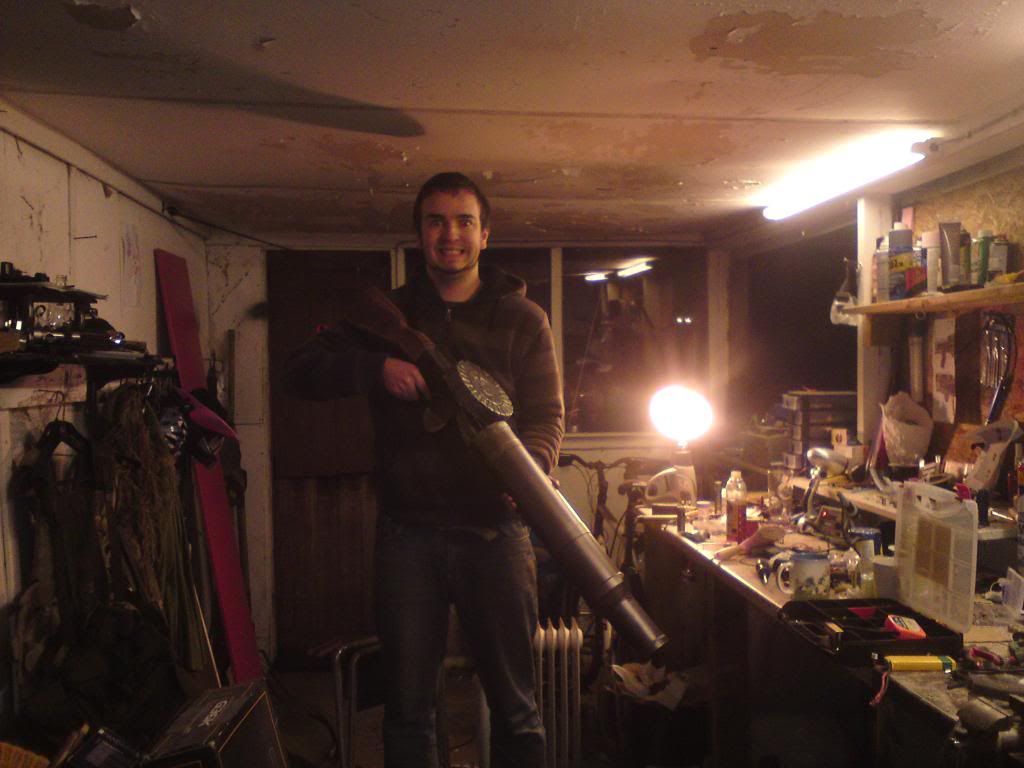 |
|
|
|
Post by kalashnikovkid on Jan 18, 2011 14:23:58 GMT -5
What can I say, I like big butts. So here's mine! 3mm Ali sheet. Dremel'd and beaten to shape. Will ali black it when I finish the rest of the gun. 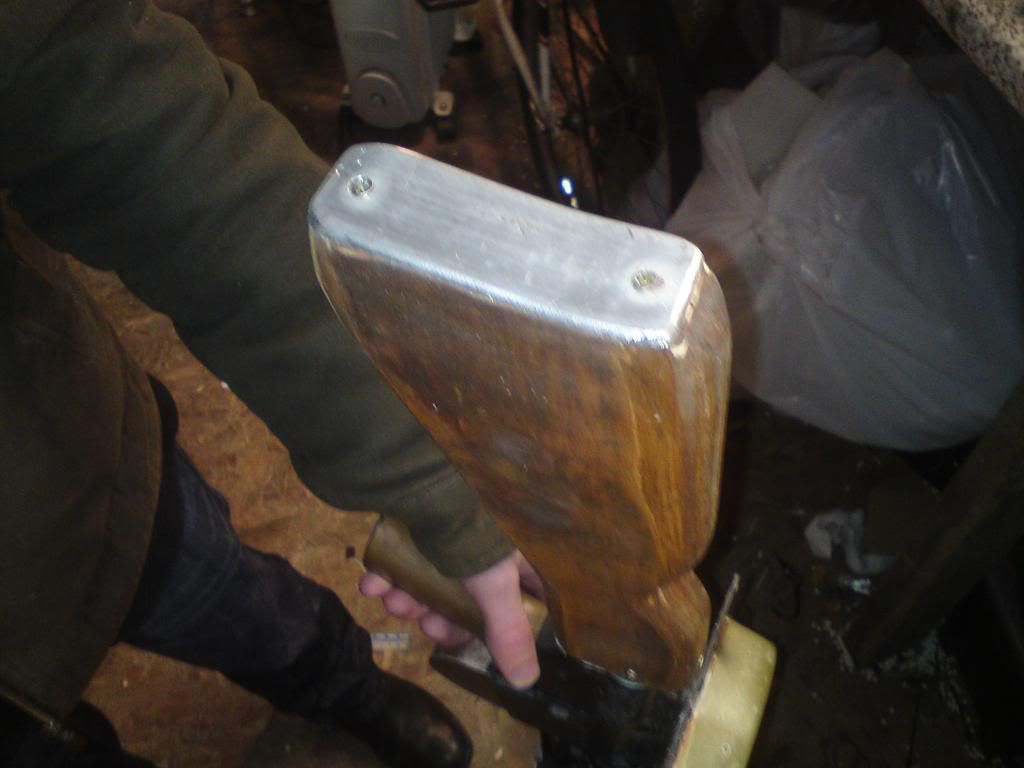 Would have done more but just spent most of the night sorting out the workshop. Got lots of airsoft bits that needed sorting, more than I thought I had. Why I have 12 bevel gears I don't know :S |
|
|
|
Post by kalashnikovkid on Jan 18, 2011 14:25:01 GMT -5
Here it is.... We came to a mid point on the finish, looks close enough but could be better in my eyes. I think the fact we spent £30 making this adds to the "individual" look  I'm very happy with it as despite the flaws. It shoots fantastically. 327fps with the hop set, feeds fine and has good range and spread. Then there's the epic loudness! it's solid as a rock but next months play test will tell me how solid our new toy is  Any who... PHOTOs 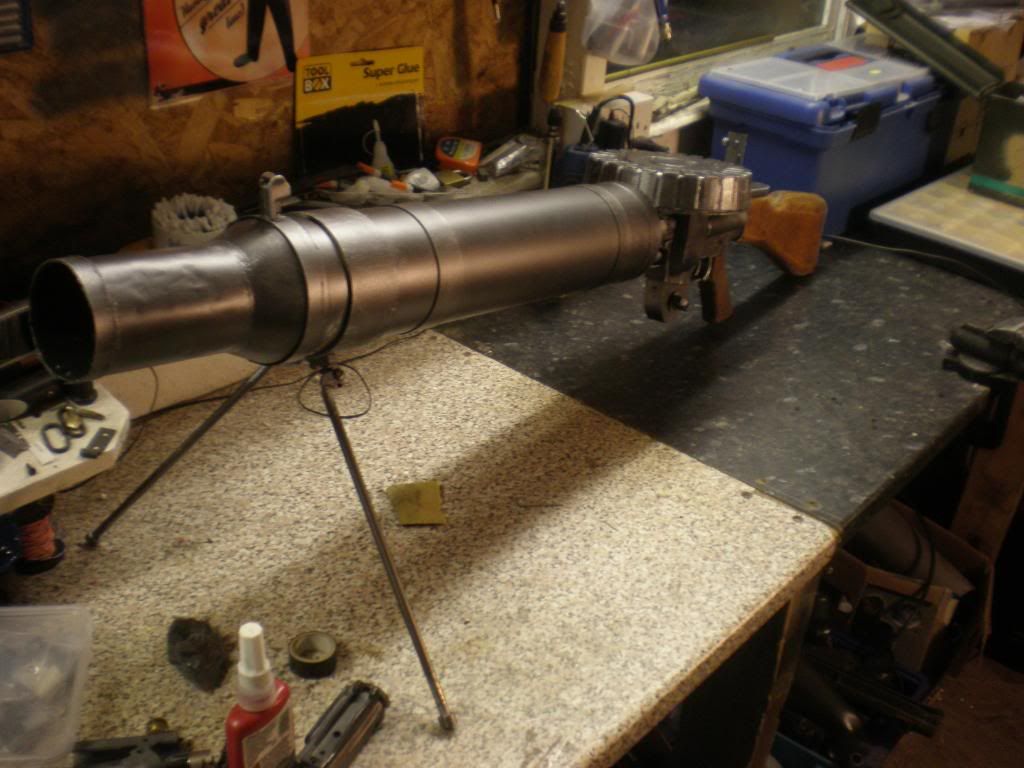 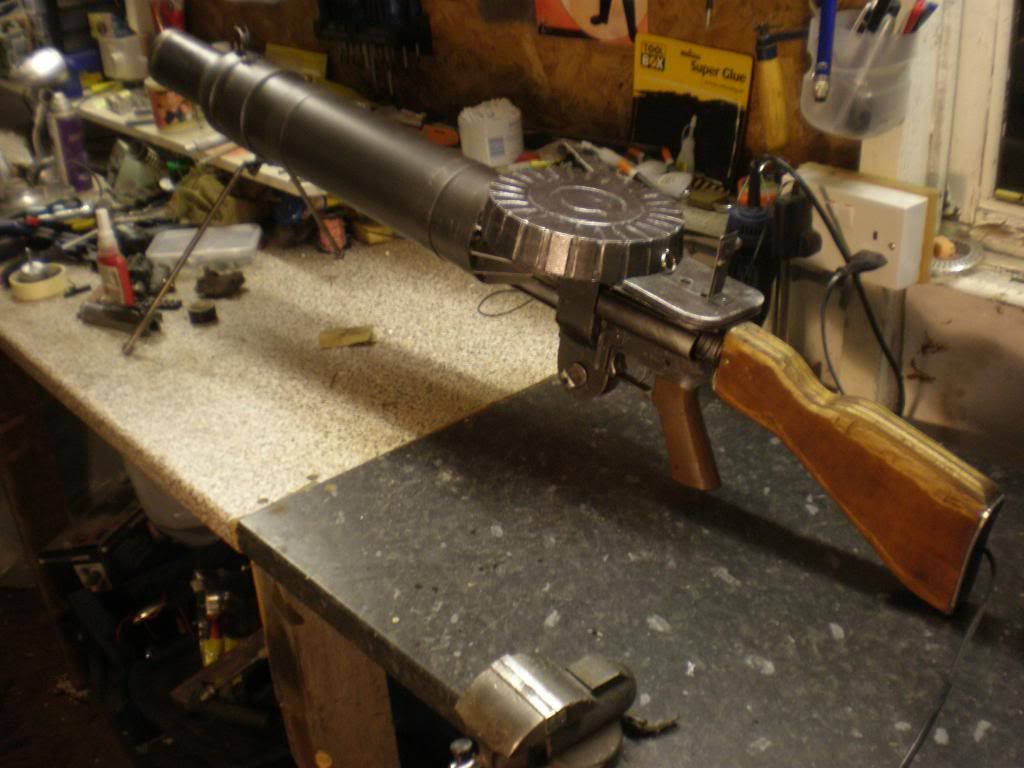 "ugly" receiver side 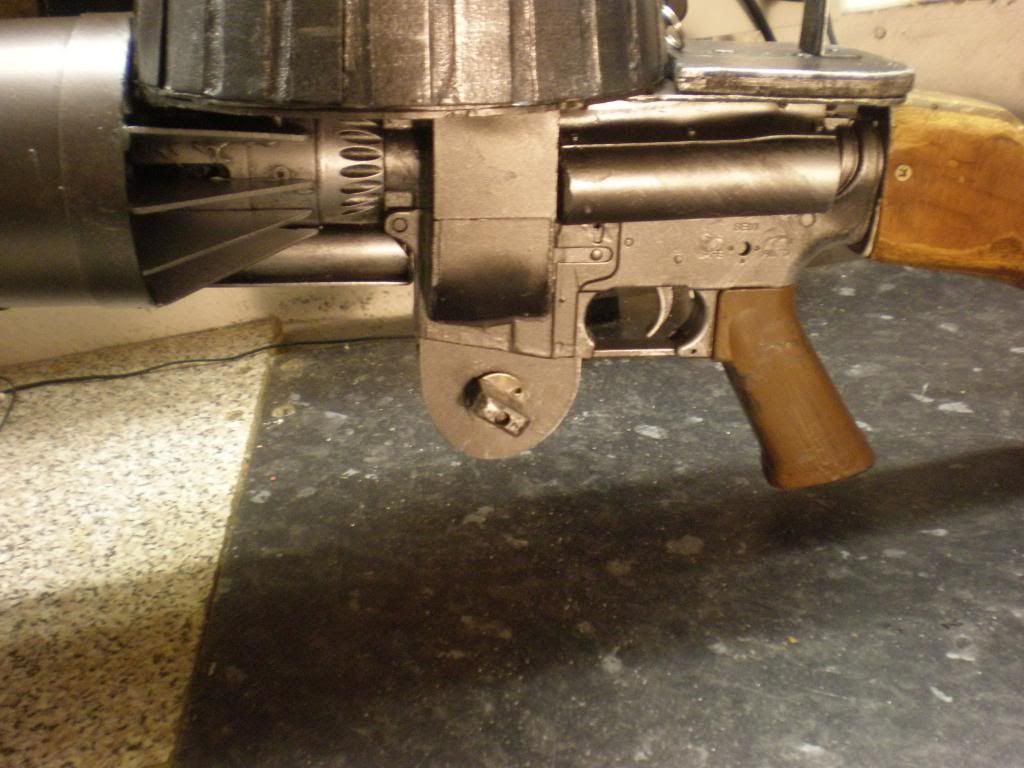 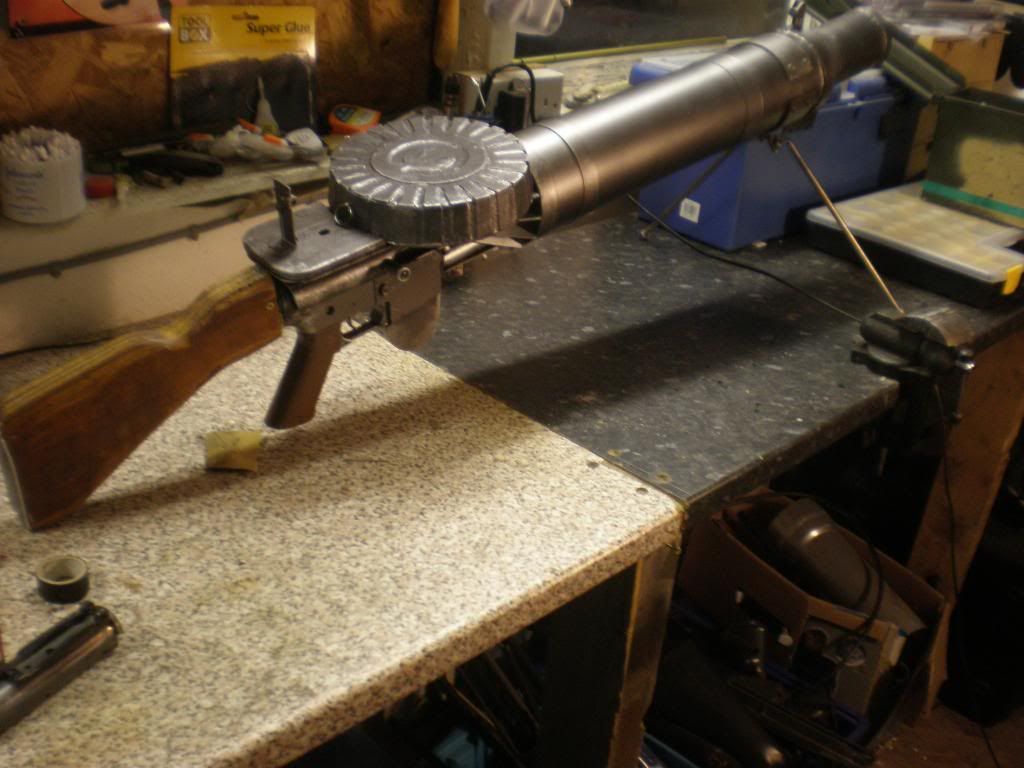 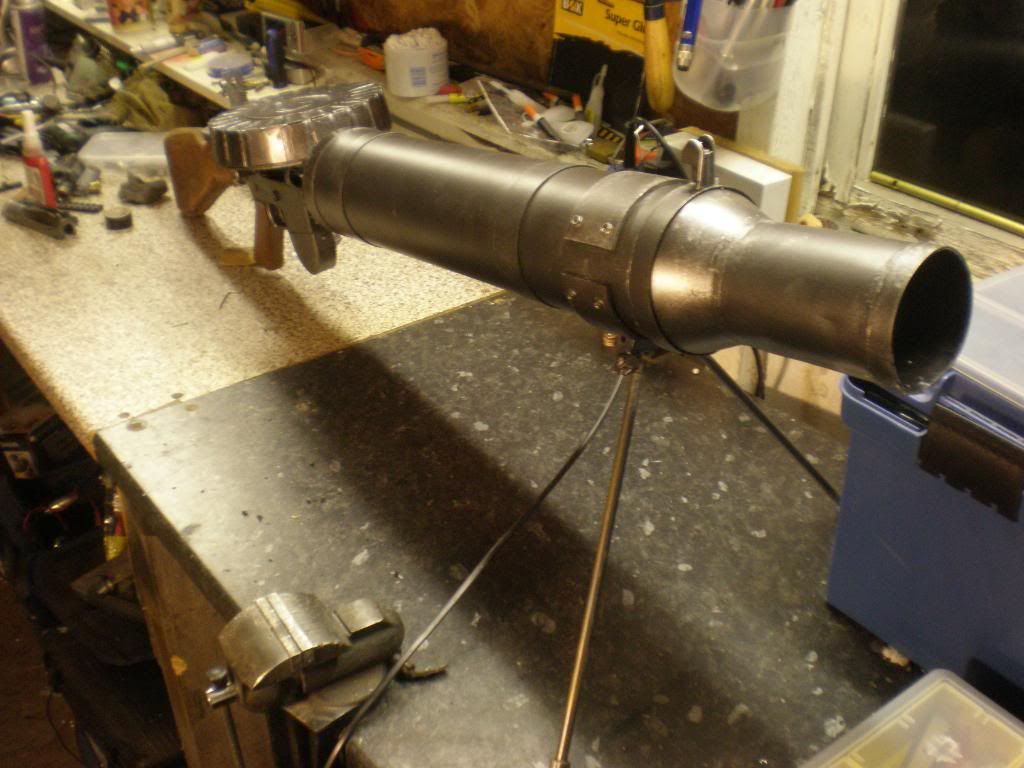 Rear sight made from a m4 hicap base and some "greeblies" 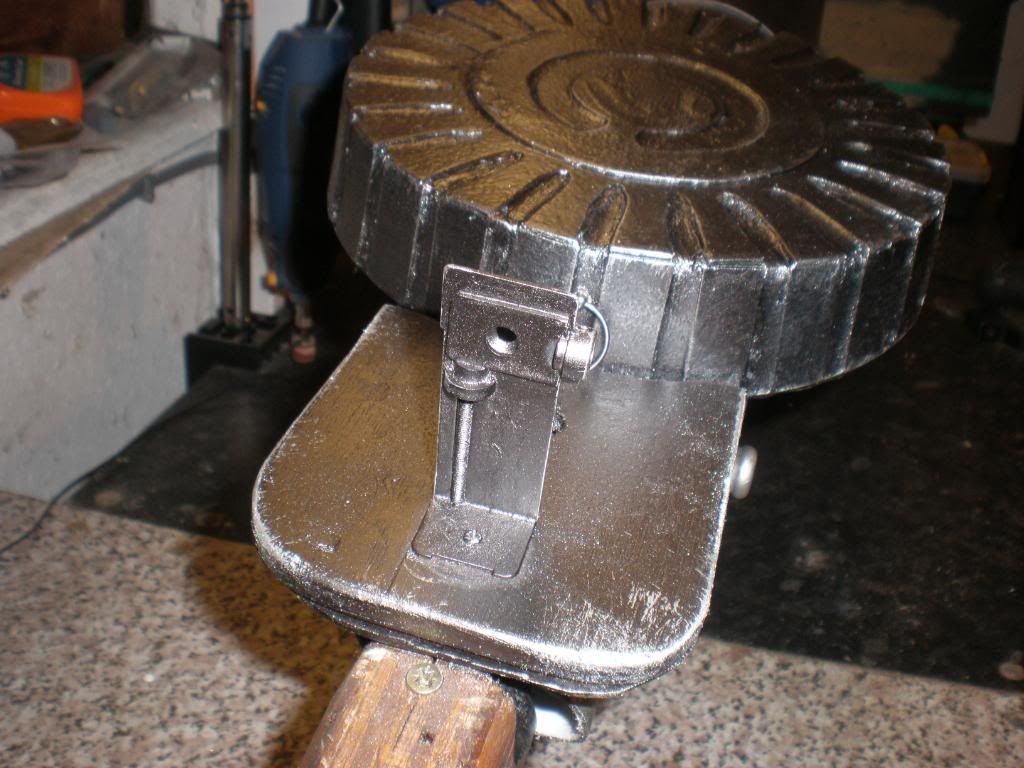 That happy face again... 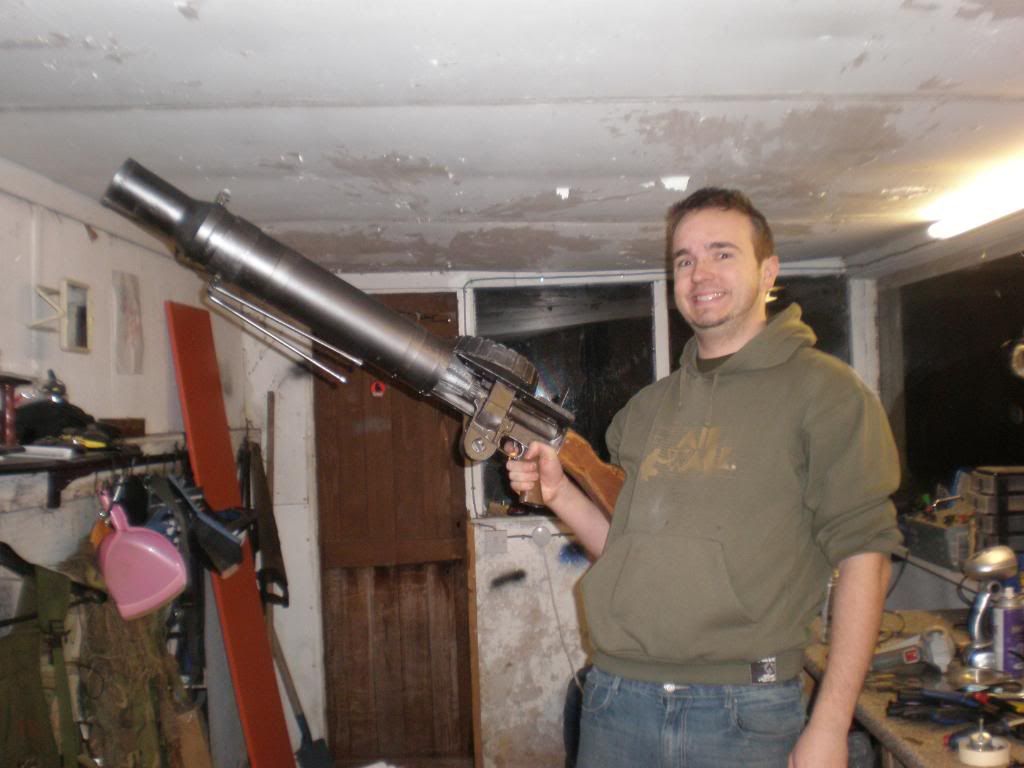 A shot for size comparison 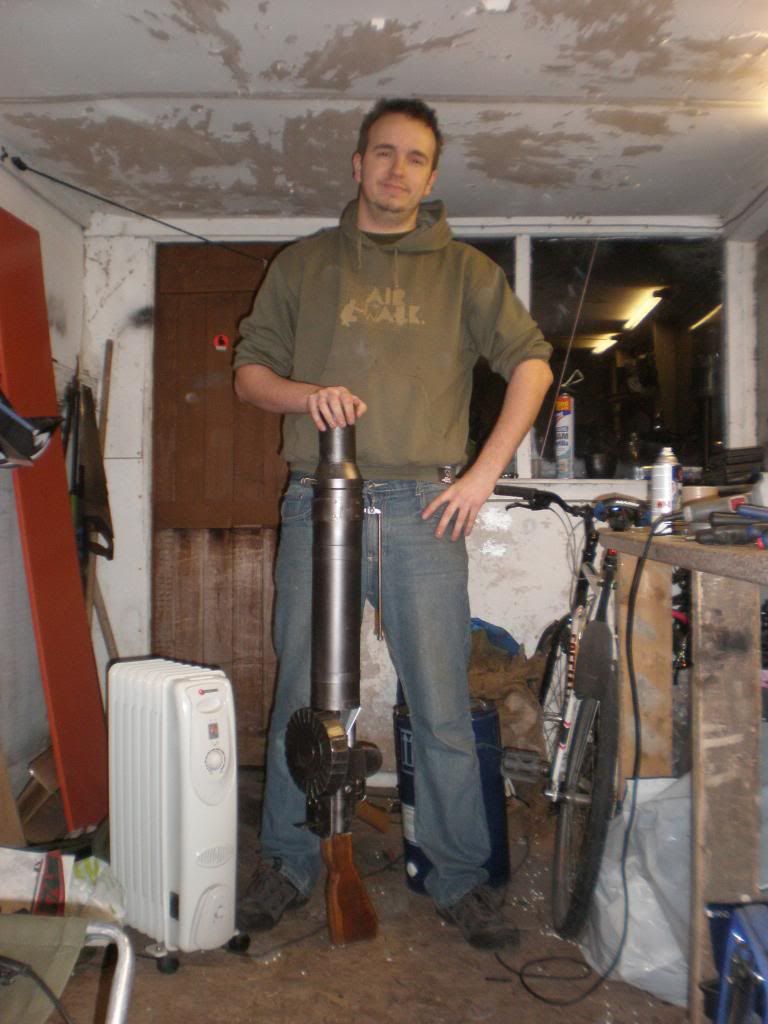 5'10" rob with the 50 inch lewis gun 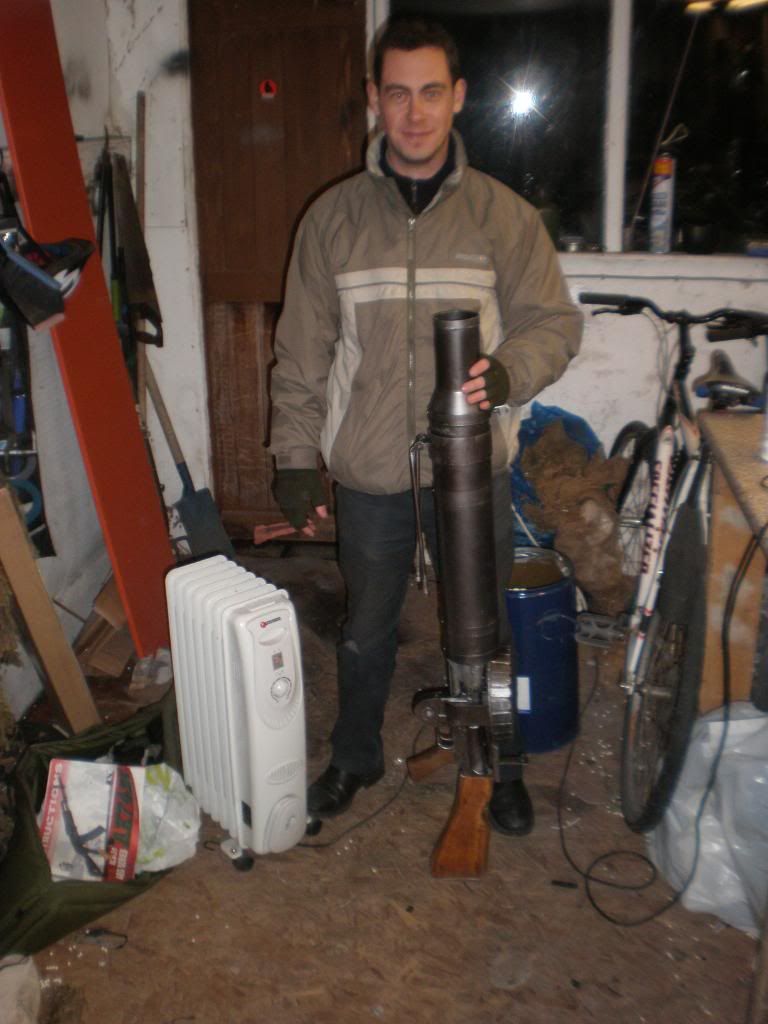 MOAR happy face  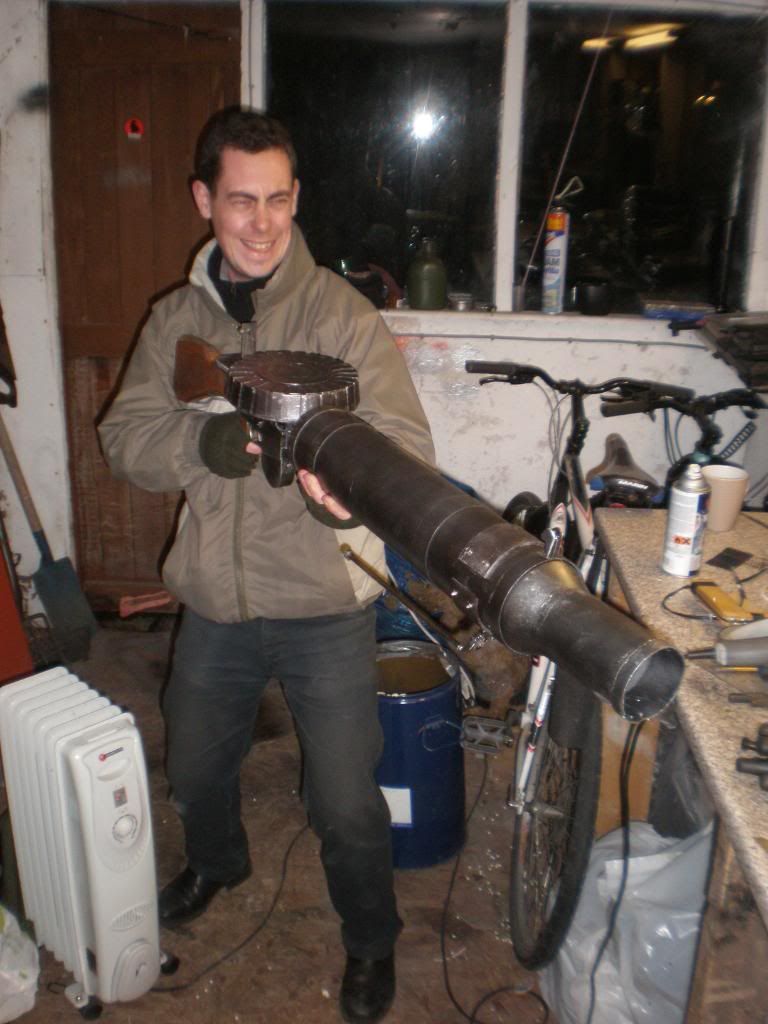 more en route... The customs so far... 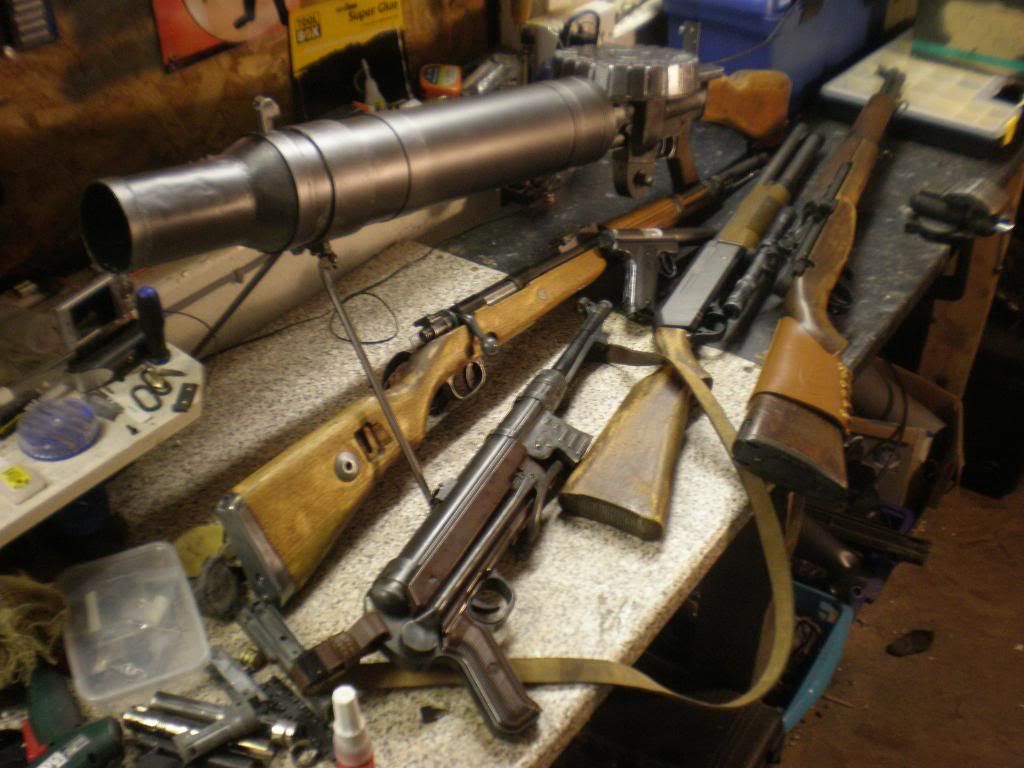 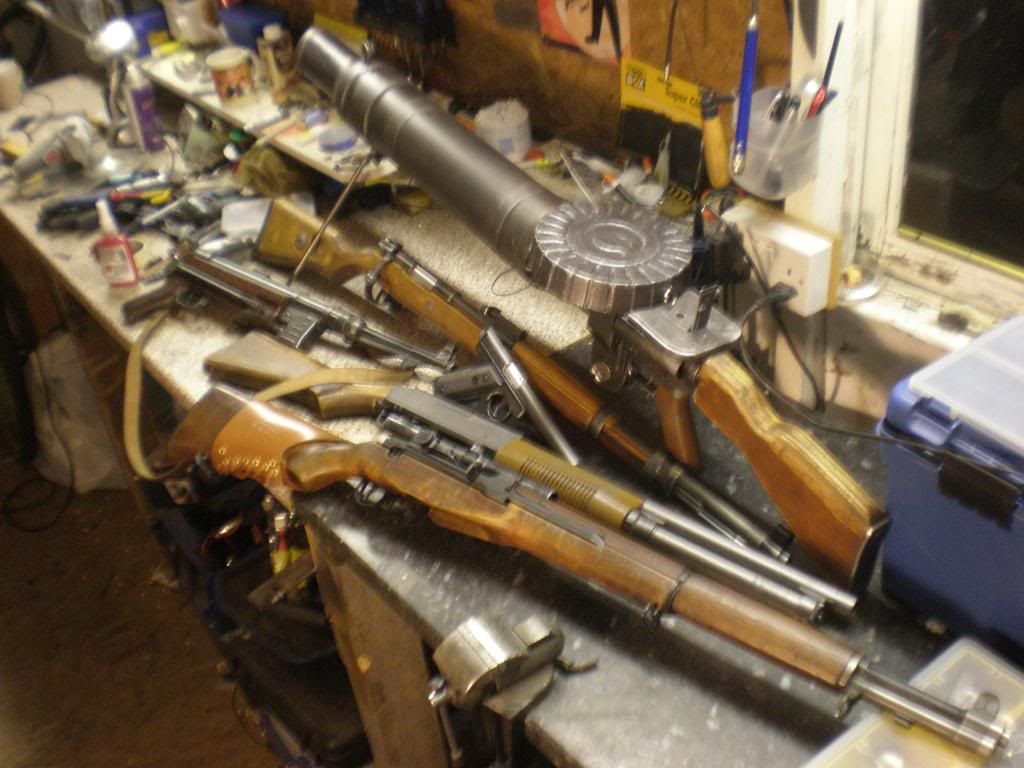 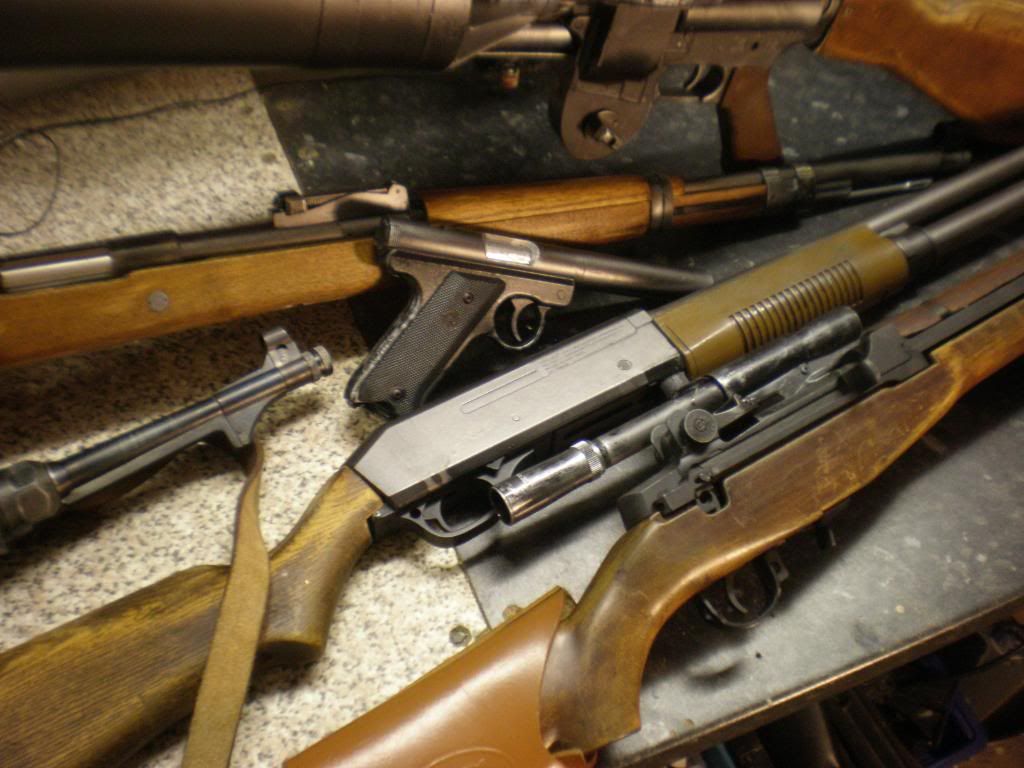 Hope you like it. Comments welcome Thanks Dave(and Rob) |
|
|
|
Post by kalashnikovkid on Jan 18, 2011 14:25:46 GMT -5
|
|
|
|
Post by kalashnikovkid on Jan 18, 2011 14:27:01 GMT -5
A video from the dangerous end to show the muzzle report, using a TM tommy gun as a comparison. www.youtube.com/watch?v=OTNwcBTX5oEAnd that's it gent's. Hope you like it. Comments welcome  Thanks Dave |
|
|
|
Post by childofalara on Jan 18, 2011 17:16:42 GMT -5
Looks freakin epic! Would you ever consider converting others M4's into these? I'd buy!
|
|
|
|
Post by newcomer on Jan 18, 2011 18:19:51 GMT -5
sir, you are an amazing creator. I would never imagine an m4 being made into a lewis gun, you did an epic job, worthy of a medal!
|
|
morganm
Private
"For us, there was no land behind the Volga"
Posts: 151
|
Post by morganm on Jan 19, 2011 0:02:17 GMT -5
Wow! That is amazing! And it only cost $60 (exchange rate I believe is close to $2 per £1) you guys from "across the pond" really make some radical customs! Too bad you're government made it almost impossible to buy real firearms. Well, I guess that's another reason there are so many custom builders in the UK, since all the would be firearms owners are into airsoft so more of the population does these customs than here in the US, so more innovative people are added to the mix.
|
|
|
|
Post by 10target on Jan 19, 2011 0:54:35 GMT -5
This is absolutely ground breaking astonishment! One word.....wow!
|
|
|
|
Post by kalashnikovkid on Jan 20, 2011 11:38:40 GMT -5
Thanks gents, Took a while to do on and off. Worst bit about building guns is you see all the bits that aren't right! I'm happy with the looks from a distance  Speaking of being on the wrong side of the pond for guns, I'll be honeymooning in the good ol US of A in August. I'll be in the nearest range that'll let me  Thanks Dave |
|
daug
Private
Posts: 37 
|
Post by daug on Jan 20, 2011 17:52:01 GMT -5
Great, great job, very good, it's awesome..... beautiful, I like it .....woooowwwwww
|
|
|
|
Post by FlyingSquirrelcat on Feb 15, 2011 16:31:26 GMT -5
I'm more than amazed at your skills as a craftsmen and fabricator. Cheers to one of the most beautiful lewis guns I've ever seen.   |
|
|
|
Post by glymov on Apr 20, 2011 6:02:13 GMT -5
nice 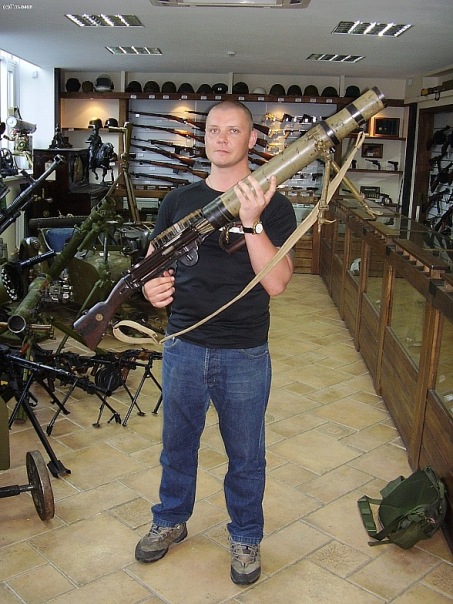 |
|
2nd Bat
Master sergeant  
Posts: 11,813
|
Post by 2nd Bat on Apr 20, 2011 21:34:36 GMT -5
Very impressive. I love the fact that you designed it to be loud. One cryingneed for airsoft is to increase the volume of the reports when fired.
|
|
Ersatzjack
Corporal
  "That silly Franz... he thinks we are winning."
Posts: 1,093
|
Post by Ersatzjack on Apr 20, 2011 22:30:31 GMT -5
Nice work. Looks like that will be loads of fun. I agree that the sound is pretty cool and I also like the easy loading.  |
|
|
|
Post by volkssturm on Apr 20, 2011 22:59:44 GMT -5
Very impressive. I love the fact that you designed it to be loud. One cryingneed for airsoft is to increase the volume of the reports when fired. I've thought on occasion that it should be possible to build a sound generator that would give something closer to the sound of real gun. Of course, the local cops might not like that. |
|
|
|
Post by woowoo997 on Jan 27, 2012 12:43:48 GMT -5
Hey, I have quite a few questions for you. To begin with what size is the drain pipe you used. e.i. length, and diameter, and is it metal? How did you attach the water bottle, lamp shade, and drain pipe together, the PVC on the sides of the upper receiver what size was it, how did you attach the HIPS to the mag shell, what is the inner mag shell made of, how did you attach the front site and heat fins, and what were the fins made of?
If you could help me I would be very grateful 'cause I'm planing on making one for my airsoft team. One last question, would you have done anything different?
Thank you, very very awesome!
|
|
2nd Bat
Master sergeant  
Posts: 11,813
|
Post by 2nd Bat on Jan 27, 2012 18:57:59 GMT -5
The feed system from the drum up above funneled into the chute and then down into the high cap is brilliant. Very very clever in so many ways. Again I love the sound and the detail work on the upper drum.
|
|
|
|
Post by ronin677 on Nov 22, 2015 15:24:10 GMT -5
Against my M16  Hey buddy, do you have any more photo's of your M16? The Vietnam war is really my thing and I am in awe of your M16. How did you weather it? and is that a cleaning rod attached to it? |
|
2nd Bat
Master sergeant  
Posts: 11,813
|
Post by 2nd Bat on Nov 23, 2015 15:08:29 GMT -5
Why wasn't this stickied way back when. This is such a cool thread showing creativity, skill and artistry with a keen focus on functionality. I especially love the enhanced report which takes advantage of the enormous size of the barrel shroud.
As for the M16. It was reasonably common for frontline Infantry troops to attach their cleaning rod to the rifle when in the field so as to keep it handy. In addition cloth tape was attached to everything. Sling hardware as well as the plastic bits (handguard and butt plate) to reduce glare, improve grip and mostly cut down on the sound it made when moving. An additional little info is that on a real M16 the pistol grip is hollow (no AEG motor). I and a lot of my fellow Infantrymen kept a spare morphine syrette in there which was held in place with a rubber carbine mag cover cloth tape or combination of both.
In addition many Infantrymen ditched their slings to further reduce sound. I did so but tied a bootlace to the front site and handguard.
|
|
|
|
Post by ronin677 on Nov 26, 2015 10:23:09 GMT -5
Thanks 2nd Bat. Lots of cool info there  funny but when I served with the British forces, our L85's also had hollow pistol grips and we too stowed additional kit in there. I personally kept a combi tool in there wrapped in cloth. Quick access to give the gas ports on the rifle a once other if we stopped for 5 minutes. |
|
2nd Bat
Master sergeant  
Posts: 11,813
|
Post by 2nd Bat on Nov 26, 2015 15:08:46 GMT -5
The point airsofters need to be made aware of is soldiers universally figure out what works and to the degree they are allowed to they adapt, modify, adjust and improvise. If in the field you find that something according to regulations is an impediment you revise it if at all possible.
War is a messy business. Not at all the precise, orderly world of a Garrison Army. One of the reasons the US Army was as effective as it was (by late war) is they by nature are individualistic and improvisational by nature. The German Army by design tried to squelch this natural human charcteristic but I guarantee you, at the point of the spear, on the front lines, seasoned soldiers were every bit as adaptive.
|
|
|
|
Post by ronin677 on Nov 27, 2015 14:31:13 GMT -5
2nd Bat - thank you saying that  I was beginning to think I was the only one who thought that way hahaha. You are right, war is a messy business and I've found that what ever works, works  Pm me, I'd love to hear your story. As you probably figured I am a former British squaddie  boy do we have some jokes about you yanks  haha |
|
 sorry if the post's seem a little out of joint, it's a copy and paste job

 cut down VN high cap will provide ammo feed (more details later)


 sorry if the post's seem a little out of joint, it's a copy and paste job

 cut down VN high cap will provide ammo feed (more details later)


