Post by thunderw21 on Jul 9, 2014 18:43:14 GMT -5
Or at least 1911A1-ish.
A while ago I purchased, on a whim, one of those Black Ops 1911s from Walmart for use as a backup gun. Though there are mixed reviews about this gun, I've had no problems with mine and have put it to good use.
However, since I've gone the WW2 route I wanted something a little more WW2 authentic without having to spend $100 on another gun I'd barely use anyways. So, I busted out the Black Ops (henceforth 'BO') 1911 and figured what needed to be changed.
First of all, I wasn't looking for a perfect replica. That would have been impossible with the route I took: the BO 1911 is hi-capa, has integral adjustable sights, an extended beavertail grip safety, a rounded hammer with a hole through it, a trigger with three holes through it, an ambi safety, threaded barrel, and angled slide serrations. Some of these can be addressed, others cannot. Like I said, I didn't want perfection, just something that would look halfway decent from 10 feet away that would fill my holster.
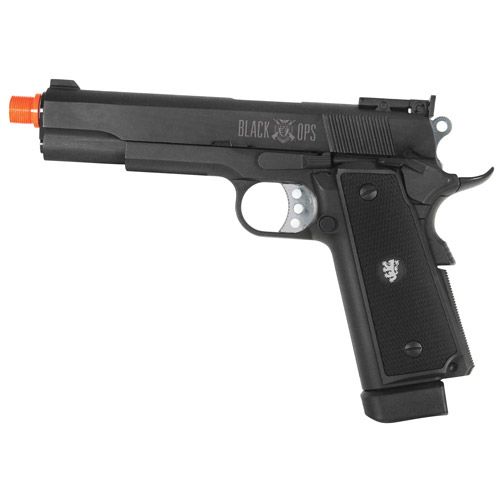
Here's the gun before I reworked it, I'm sure we've all seen these at Wally World:
And a review if you're interested.
www.youtube.com/watch?v=lkq33_n74AY
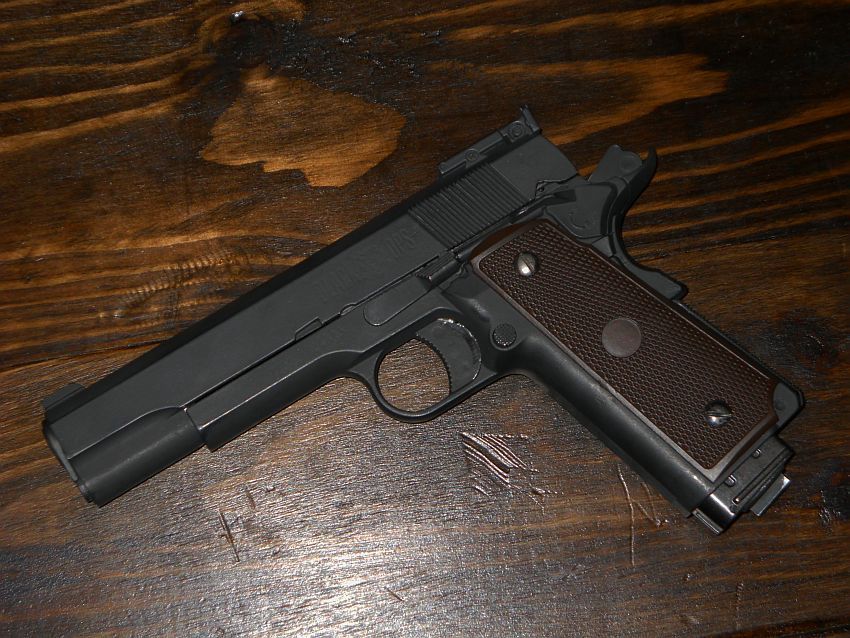
Here are some after shots:
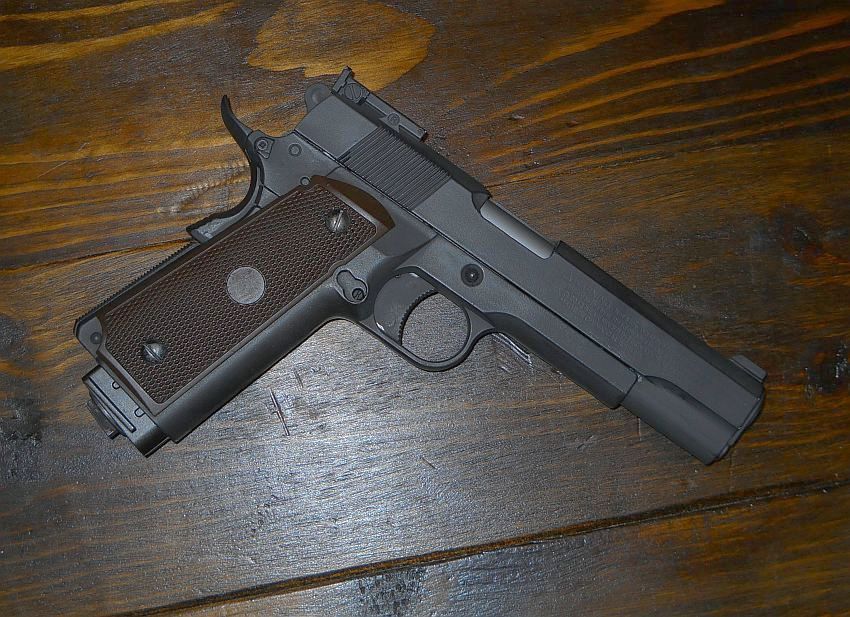
This photo shows the colors correctly.
Here are the three items needed for the project (minus the tools, of course).
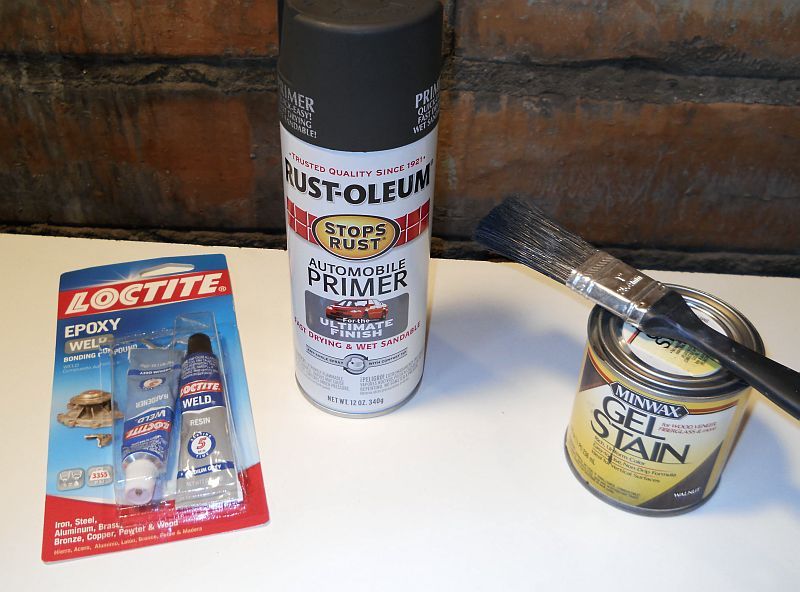
The epoxy was for filling the holes in the trigger and hammer, the paint for the gun itself, and the stain was used on the grips. I chose the paint for both the color, which is a perfect match for parkerization, as well as durability. These three items cost me roughly $15 total.
Alright, down to the nitty-gritty. First of all, I disassembled the entire gun. The ambi safety had to go not only because it wouldn't look or feel right, but also because the left-handed safety was awful and didn't work well at all. I wanted to just remove the whole piece but found out I couldn't because it was a spacer for the safety screw so I just took a saw to it and chopped most of it off. All I was left with was the spacer. I then filed down the sharp edges.
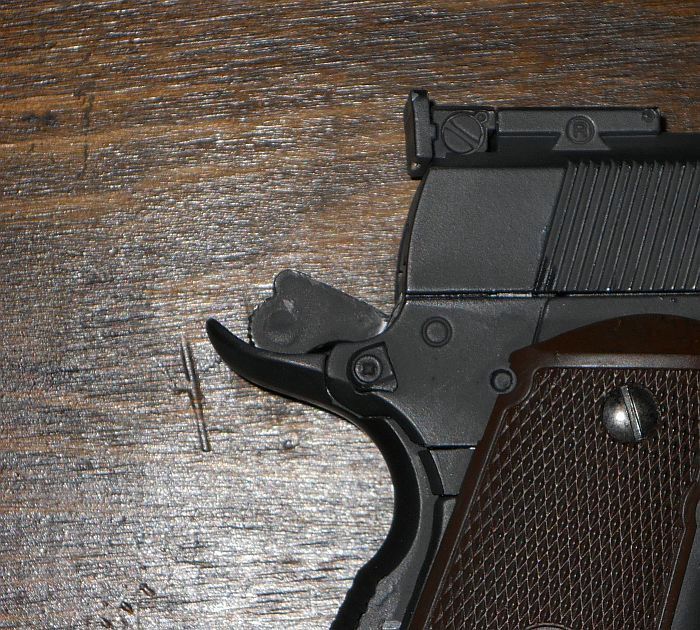
Next I make some epoxy and filled the hammer and trigger holes. At first the epoxy wanted to spill out of the holes but it quickly dried and I sanded it down.
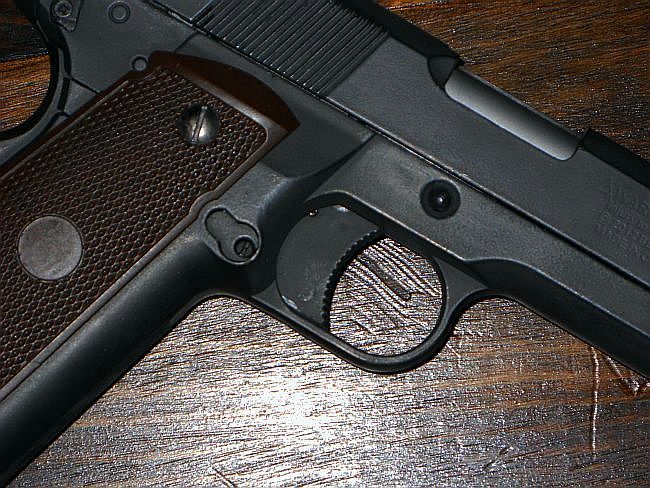
Here's a pic of the hammer, left-handed safety (or what's left of it), and the trigger after the work:
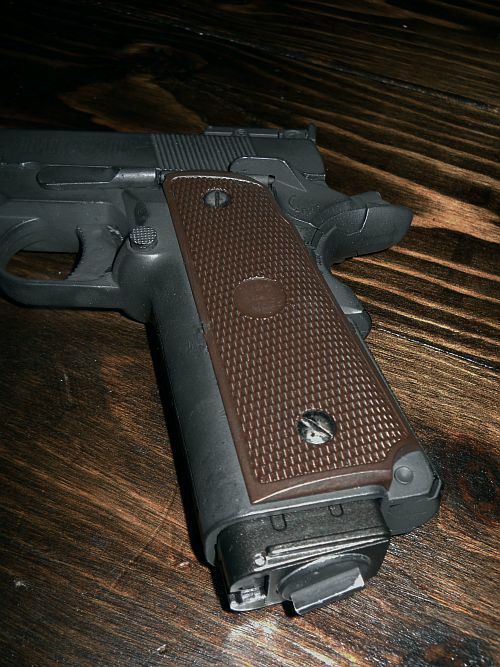
Next I broke off the hideous orange threaded barrel tip, later painting the barrel with the rest of the gun. The grips got a couple layers of the wood stain for that nice rich brown color. It's important to let the stain completely dry before putting on a second coat or handling. It takes a while, so I advise putting the wet grips out in the sun to dry. Make sure they're not tacky before handling!
Grips:
Then I painted all of the parts that needed it: frame, slide, barrel, bushing, plug, etc. Multiple thin coats were applied and the pieces set out in the sun to dry. Once fully dried this paint is pretty tough and looks nice. It's pretty tough paint and 'ages' well with use. My pistol already has some nice holster wear.
Some things I didn't change are the double-stack mag (can't change that), the rear sight (could have been dremelled and epoxied but I chose not to), angled slide serrations (no big deal), beavertail grip safety (again, no big deal), rounded hammer (meh), and the magazine hangs below the frame (can't fix that).
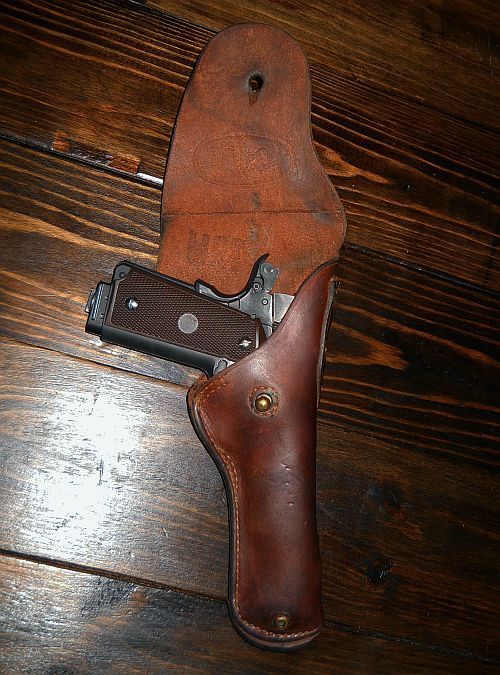
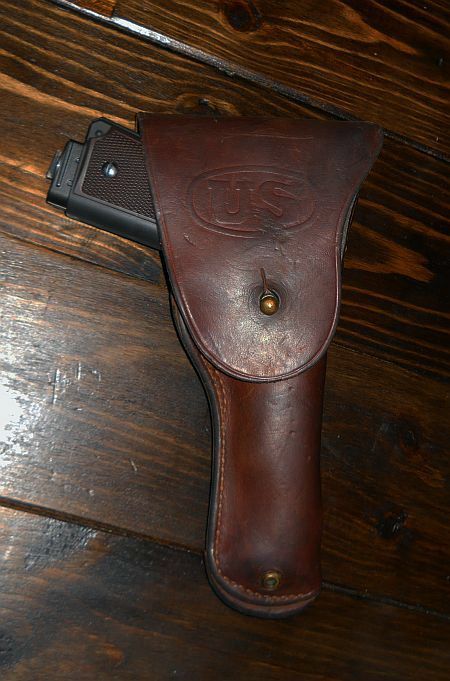
I was a bit worried that, being hi-capa, it wouldn't fit in my holster as well as the beavertail grip safety wouldn't allow the holster flap to fully close. However, with its thin grips it's the same width as a 1911A1 and the beavertail didn't inhibit the flap from closing.
Fits perfectly into my 1944-dated holster.
All in all this was a successful project. I succeeded in creating a pretty decent lookalike for very little money. If you have a BO 1911 or another non-WW2 1911 and are wanting a WW2-style 1911, I would recommend this route, at least until you have the resources to get a WW2 style 1911. The project took about 2 days and cost roughly $15 to complete. I'm happy with the results.

A while ago I purchased, on a whim, one of those Black Ops 1911s from Walmart for use as a backup gun. Though there are mixed reviews about this gun, I've had no problems with mine and have put it to good use.
However, since I've gone the WW2 route I wanted something a little more WW2 authentic without having to spend $100 on another gun I'd barely use anyways. So, I busted out the Black Ops (henceforth 'BO') 1911 and figured what needed to be changed.
First of all, I wasn't looking for a perfect replica. That would have been impossible with the route I took: the BO 1911 is hi-capa, has integral adjustable sights, an extended beavertail grip safety, a rounded hammer with a hole through it, a trigger with three holes through it, an ambi safety, threaded barrel, and angled slide serrations. Some of these can be addressed, others cannot. Like I said, I didn't want perfection, just something that would look halfway decent from 10 feet away that would fill my holster.
Here's the gun before I reworked it, I'm sure we've all seen these at Wally World:

And a review if you're interested.
www.youtube.com/watch?v=lkq33_n74AY
Here are some after shots:

This photo shows the colors correctly.

Here are the three items needed for the project (minus the tools, of course).

The epoxy was for filling the holes in the trigger and hammer, the paint for the gun itself, and the stain was used on the grips. I chose the paint for both the color, which is a perfect match for parkerization, as well as durability. These three items cost me roughly $15 total.
Alright, down to the nitty-gritty. First of all, I disassembled the entire gun. The ambi safety had to go not only because it wouldn't look or feel right, but also because the left-handed safety was awful and didn't work well at all. I wanted to just remove the whole piece but found out I couldn't because it was a spacer for the safety screw so I just took a saw to it and chopped most of it off. All I was left with was the spacer. I then filed down the sharp edges.
Next I make some epoxy and filled the hammer and trigger holes. At first the epoxy wanted to spill out of the holes but it quickly dried and I sanded it down.
Here's a pic of the hammer, left-handed safety (or what's left of it), and the trigger after the work:


Next I broke off the hideous orange threaded barrel tip, later painting the barrel with the rest of the gun. The grips got a couple layers of the wood stain for that nice rich brown color. It's important to let the stain completely dry before putting on a second coat or handling. It takes a while, so I advise putting the wet grips out in the sun to dry. Make sure they're not tacky before handling!
Grips:

Then I painted all of the parts that needed it: frame, slide, barrel, bushing, plug, etc. Multiple thin coats were applied and the pieces set out in the sun to dry. Once fully dried this paint is pretty tough and looks nice. It's pretty tough paint and 'ages' well with use. My pistol already has some nice holster wear.
Some things I didn't change are the double-stack mag (can't change that), the rear sight (could have been dremelled and epoxied but I chose not to), angled slide serrations (no big deal), beavertail grip safety (again, no big deal), rounded hammer (meh), and the magazine hangs below the frame (can't fix that).
I was a bit worried that, being hi-capa, it wouldn't fit in my holster as well as the beavertail grip safety wouldn't allow the holster flap to fully close. However, with its thin grips it's the same width as a 1911A1 and the beavertail didn't inhibit the flap from closing.
Fits perfectly into my 1944-dated holster.


All in all this was a successful project. I succeeded in creating a pretty decent lookalike for very little money. If you have a BO 1911 or another non-WW2 1911 and are wanting a WW2-style 1911, I would recommend this route, at least until you have the resources to get a WW2 style 1911. The project took about 2 days and cost roughly $15 to complete. I'm happy with the results.


