|
|
Post by Guinness on Sept 20, 2007 1:46:03 GMT -5
Hey everybody, I'm finally getting around to working on the next installments of the weathering process 'how-to' series, so I moved my original article and sticky'd it In this thread ya'll can post your work, please try to keep the images a reasonable size so folks with 800x600 desktops don't go crazy trying to view them- In other words, if you don't have graphics software on your PC to resize images, you may not want to post...  You guys have shared some outstanding work, now let's see some more gentlemen! |
|
Gerry
Master sergeant   Wilkommen zu Italien!
Posts: 819
|
Post by Gerry on Sept 20, 2007 10:59:42 GMT -5
This is perfect timing! After spending the weekend at Ikes farm in Gettysburg PA and looking at all the originals, I've decided to weather my K98 G model! Thanks Guinness! As always VERY informative and creative! Perfect! No If I can just get the stock circles out of the rifle!  |
|
Gerry
Master sergeant   Wilkommen zu Italien!
Posts: 819
|
Post by Gerry on Sept 22, 2007 21:55:20 GMT -5
Just finished up my G33/40 project! Not only was this a perfect tutorial...... it was super simple and made a 100% difference in the look of my rifle! Total cost was about $20 and 3 hours of Leisurely work while watching a movie. Thanks Guinness! Here is a photo of my rifle on the day I bought it from Ersatzjak (Otto)  Here are a few photos of the rifle after the weathering process 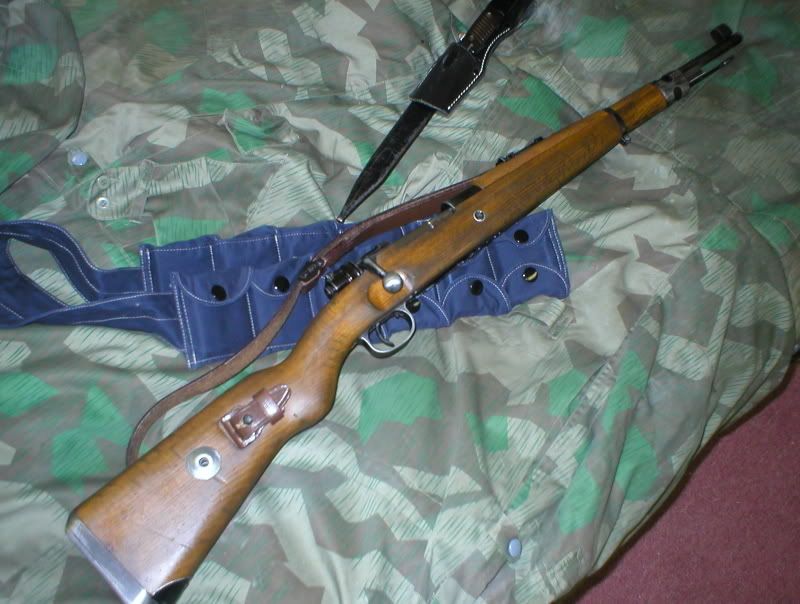 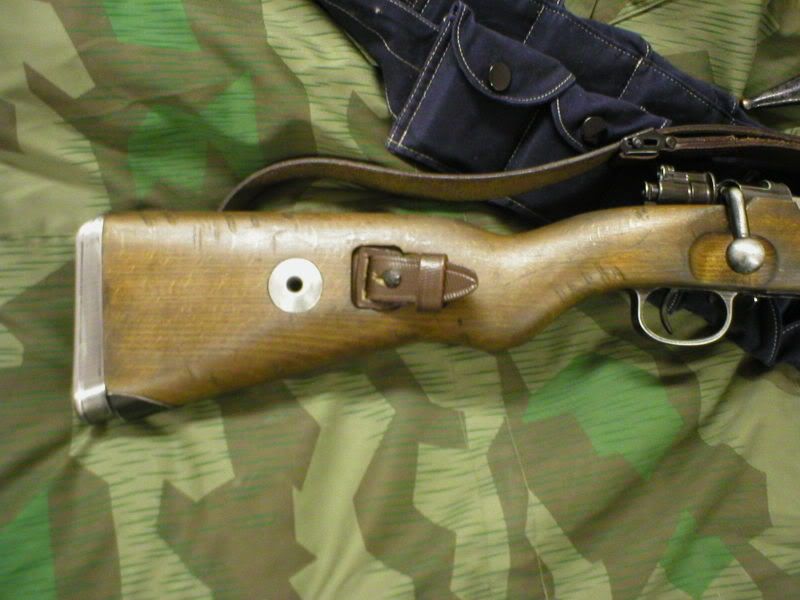 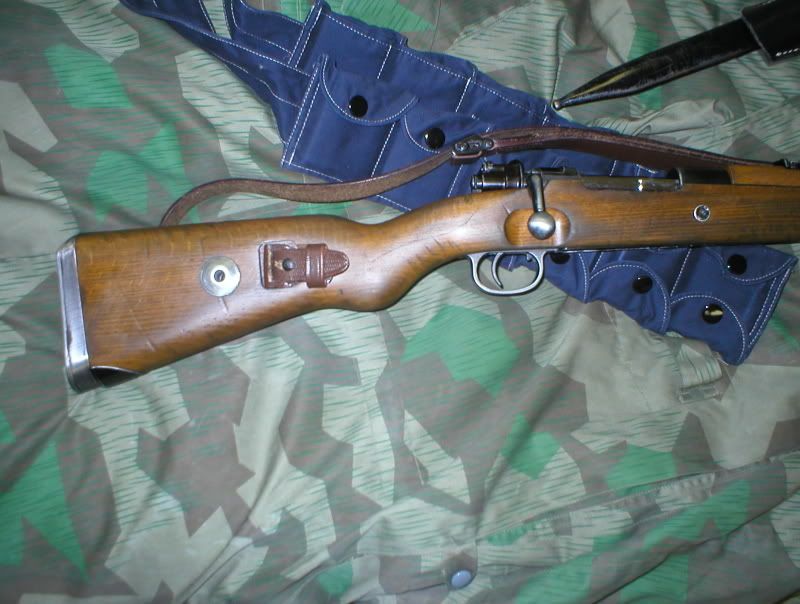 here is an original G33/40 stamped 1943 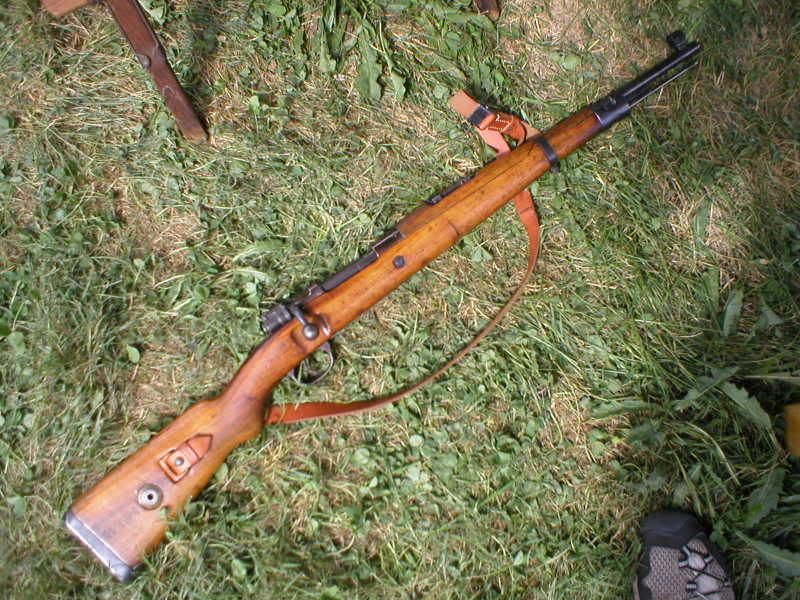 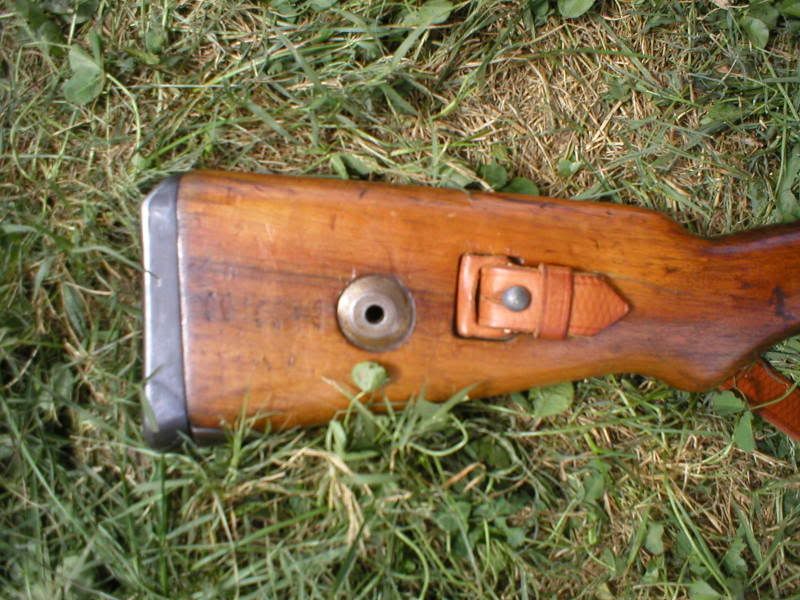 This was quite enjoyable, but I couldnt find linseed oil so I took a chance and used a product called Dutch oil I think it worked out great ! Thanks again Guiness! |
|
Nimlas
Master sergeant   grumpy
Posts: 1,594
|
Post by Nimlas on Sept 22, 2007 22:10:51 GMT -5
Guns look great guys!
I'm working on re staining all my 1928 furniture as we speak!
|
|
ersatzjack2
Private 1st Class
 "We can still win this thing, once the secret weapons arrive."
Posts: 612
|
Post by ersatzjack2 on Sept 22, 2007 22:24:27 GMT -5
Gerry528, you did a real good job on weathering. Your gun looks 10 times better now. My guess is that you are very happy with the results. Great work.
|
|
YankeeDiv26
Staff Sgt.
   Frustrated Mac Owner
BDM<33
Posts: 2,462
|
Post by YankeeDiv26 on Sept 22, 2007 22:32:25 GMT -5
wow, awesome thread guiness. Thank you. I'd love to weather my garand more, but its lower stock is plastic but should soon be replaced with a wood stock. As soon as that seporate project (and that little thing called a 1919a6) is outta the way, I'm gonna de-purdify it. Somethings look plain ol' better when they've shown use. I love the character it adds.
|
|
2nd Bat
Master sergeant  
Posts: 11,813
|
Post by 2nd Bat on Sept 23, 2007 12:57:55 GMT -5
Great article, wonderful pictorial/ tutorial!
Yank Division 26, You can follow the same steps with the plastic although instead of the claw end of the hammer or sharp screw driver to gouge things, use a rat tailed file or dremel blade to knick small indentations. Wipe on the acrylic paints as described above until you achieve the finish appearance you're looking for and then instead of linseet oil (Which won't be absorbed into plastic and will never fully dry,) Over spray your work with a clear acrylic sealant. This can be semi gloss to dull coat depending on the look you're hoping to achieve.
It will protect your acrylic finish which would otherwise wear off from the elements and the sweat on your hands.
|
|
|
|
Post by Guinness on Sept 24, 2007 0:08:42 GMT -5
gerry- Looks amazing! I'm glad the technique worked so well for you! I've been going through a lot of Airsoft pictures tonight and its funny how you see people all decked out in authentic kit, right down to camo face paint and stuff, but there they are with thier shiney- perfectly new gun. I really think things like this add to the whole immersion of our hobby. And 2ndBat's right, the acrylic paint technique works well on plastics alsong with the distressing process he uses too  |
|
|
|
Post by Guinness on Oct 4, 2007 0:32:39 GMT -5
|
|
2nd Bat
Master sergeant  
Posts: 11,813
|
Post by 2nd Bat on Oct 4, 2007 0:45:27 GMT -5
Guinness, As always looking good. Your ability to photograph your efforts is exceptional. Top notch effort. The broomhandle and 1911 look great.
|
|
|
|
Post by migmadmavis on Oct 4, 2007 1:35:33 GMT -5
|
|
|
|
Post by Guinness on Oct 4, 2007 2:23:23 GMT -5
Looks great bro! I see we both went a little heavy on rubbing that side rail  , I ended up going back over mine with some gray krylon textured paint though because I didn't like how much aluminum was exposed. The rust effect is a nice touch, great idea! looks like our broomies are twin brothers! One tip: I would hit the grips again with some sand paper to smooth the gouges out a bit, I also took a dremel to the leading and trailing edges and then a bit through the grooves to widen and wear them down some. Excellent work my young padawan  BTW, in that last pic, what is that object behind the gun? almost looks like a homemade wing spar |
|
|
|
Post by migmadmavis on Oct 4, 2007 8:39:25 GMT -5
Oh, the object is 1/6 Renault FT-17 I made, heres a more detailed pic of it on my webshots hp good-times.webshots.com/album/557331231vexlCr?start=120 but anyways, thank for all the nice comments, and I also think I went heavy on the side rails, but since the last picture was on flash, it really brought out the rust effect, but it doesnt look like that when you look at it with the naked eye, it just gives it a slightly flater color. Thanks again for the comments, and once again, Great Job on all your work, it is amazing!!! |
|
|
|
Post by Guinness on Oct 4, 2007 9:08:48 GMT -5
  Wow! That is all homemade?? that is amazing stuff! The 'Nam GI Joe display is awesome too! reminds me of Full Metal Jacket! Where did you get that minature Viet ad sign? Great stuff man
|
|
|
|
Post by gunfreak on Oct 4, 2007 14:57:45 GMT -5
my first atempt of weathering be gentile    |
|
|
|
Post by Guinness on Oct 4, 2007 15:09:10 GMT -5
Great first attempt Truls!
If it was me I'd probably sand it down to smooth the finish out, It looks like your are retaining the original finish and just distressed it?
Thats fine of course, its just that they put that clear-cote over the wood at the factory that gives it that shiney-reflective finish that doesn't look so much like a 'battle-weary' weapon.
nice work!
|
|
|
|
Post by migmadmavis on Oct 4, 2007 20:52:08 GMT -5
|
|
|
|
Post by Guinness on Oct 4, 2007 21:01:18 GMT -5
Also Guinnes ha ve you ever tried doing the wood effect to simulated wood?? Is that possible or not? thanks -Tobin -snip- ? Not sure what you mean by 'simulated' wood- like that applique wood effect stick-on stuff for like the inside of drawers and cabinets? |
|
YankeeDiv26
Staff Sgt.
   Frustrated Mac Owner
BDM<33
Posts: 2,462
|
Post by YankeeDiv26 on Oct 4, 2007 21:14:17 GMT -5
Those look great! Something you may (or may not) want to keep in mind. Were'nt C96 mausers typically stored a lot in the wooden stock holster? Might be something to keep in mind when trying to figure out where to age them. Also, imo they might be better off with some more wear on the trigger, or wherever you typically put your finger when its not on the trigger. Also, mabye more wear around the magazine release. Just look really carefully about where you typically place your hand, and what parts wear more frequently. Again, great job, I'll have to try this sometime.
|
|
|
|
Post by migmadmavis on Oct 4, 2007 21:31:45 GMT -5
What I meant by simulated wood is like the fake wood that came with the Tokyo Marui Thompson. And also to YankeeDiv26, I was thinking to add some wear to the selector switch I believe it is, but I dont know much about this gun, but where it sais N and R I would sand that down alot, and on the bolt, I sanded it down, but Im deffinitely sanding it down more
|
|
|
|
Post by Guinness on Oct 4, 2007 21:40:21 GMT -5
Oh, well yeah- that would be the same process as what we have done to the Mauser grips or what I did on the 1911 grips above right? So, you have already 'mastered' the technique of simulated wood my young padawan  Slainte! -G |
|
|
|
Post by migmadmavis on Oct 4, 2007 21:49:32 GMT -5
Im pondering on weather or not to do the whole process to my thompson??
|
|
|
|
Post by Guinness on Oct 4, 2007 21:57:32 GMT -5
Well, I'll admit once you do one right, it kind of becomes addictive ;D But IMHO, I'd save up the $100 bucks and get the wood kit for it and do it right  |
|
|
|
Post by hank on Oct 5, 2007 15:43:59 GMT -5
I am weathering my m1928. I will the have some pics soon.
|
|
|
|
Post by migmadmavis on Oct 14, 2007 19:33:24 GMT -5
|
|
|
|
Post by Guinness on Oct 14, 2007 22:48:18 GMT -5
Very impressive man! You are ready to go and teach others the 'craft'  |
|
|
|
Post by migmadmavis on Oct 14, 2007 23:08:19 GMT -5
the only thing I dont like about mine is the 3 black lines near the end, I think I went a little overboard on them   But other than that, I think I did a pretty good job! I did order a wood kit from Boomarms to put on my other CYMA Thompson ill be getting soon. Cheers, -Tobin |
|
|
|
Post by gunfreak on Oct 15, 2007 8:18:56 GMT -5
|
|