|
|
Post by droopaille on Dec 31, 2014 12:10:38 GMT -5
Hi everybody, i'm back with a new DIY WW2 airsoft project. As usually, don't hesitate to correct my poor language. I present this project as i work on, may be it is rambling. As the title says, it is about the big spud gun M1A1. This is a command with low budget, i decide to make it all in PVC : more cheap, more easy too make, enough strong. Also i don't have a welding post. The objective :   The blueprint found on the web, i don't know if it is correct, if you have some one, i'm interested.  First step the tube D.60mm and plate for the structure.  Beginning of wood parts.  The A-T M6A3 rocket. The goal is to use an artifice rocket in the dummy rocket and as the real one, loading at the rear, connected with electric wire and fired with electric command.  Gluing the catch bolt of rocket   Semi completion of the handle. I know this is plywood but i only have this good thickness. I will can change it later. 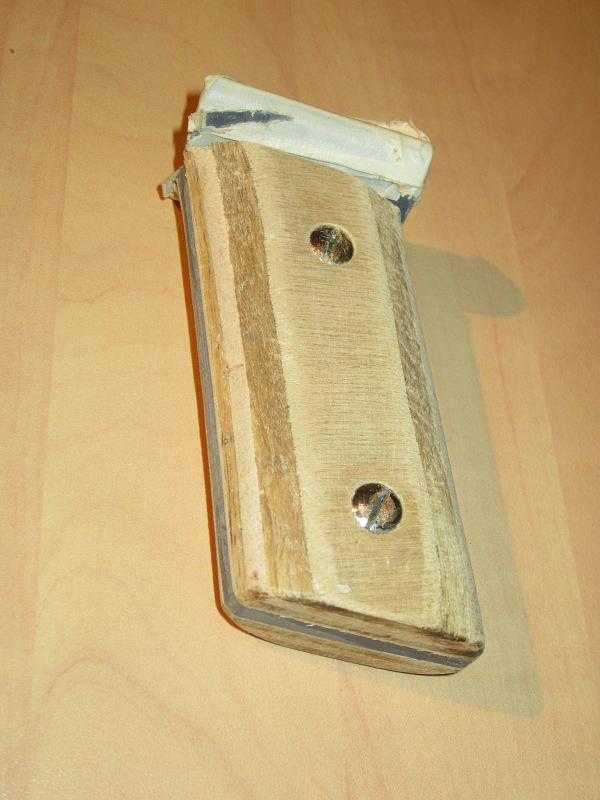 Aluminium rod bent for the trigger gard.  I use a PVC rond rod for the rear part, hot curved and glued this two component adhesive.  |
|
2nd Bat
Master sergeant  
Posts: 11,813
|
Post by 2nd Bat on Dec 31, 2014 14:14:54 GMT -5
The project looks great thus far! When you mentioned PVC hot curved. Please explain that further? I have heard that pvc can be boiled and then shaped as it cools and that with care it can be shaped while being heated up by a heat gun. Is that correct? I have been hesitant to attempt either but can see where possibilities open up exponentially if its reasonably easy to do?
|
|
|
|
Post by droopaille on Dec 31, 2014 14:28:20 GMT -5
Thank you Bat.
The PVC is really soft around 50°C. By just using a heat gun or passed it in a oven, you can make every thing you want to do. In my case, the catch bolt was a plate and now with two crease, it is a U. An other example is for the ring in the middle of the rocket head, the diameter was the same as the head, heat and force around the head now it is bigger and ajusted with the smaller diameter.
If you have made a mistake, don't worry, heat again and retry.
You have just to do one think : heat slowly for not burning the plastic.
|
|
2nd Bat
Master sergeant  
Posts: 11,813
|
Post by 2nd Bat on Dec 31, 2014 16:13:47 GMT -5
wow! that is so cool. You sir may have created a monster! The possibilities for cool props just opened up exponentially! I have created recoiless rifles in the past. a 90mm and a 57mm but not a bazooka which for me, my biggest concern was the small details like the rear cage. You glue them into place and together using what adhesives? For power I have a CO2 filled shell my son designed that works well but adapting the 40mm mosscart grenades could also work as could the assorted spud cannon ideas.
|
|
shiftysgarand
Corporal
  BangbangbangbangbangbangbangbangPING
Posts: 1,165 
|
Post by shiftysgarand on Dec 31, 2014 17:58:17 GMT -5
Very cool! How much has it costed you so far? Et droopaille, tu parles très bien anglais. |
|
|
|
Post by droopaille on Jan 1, 2015 8:57:03 GMT -5
Thanks, i use an epoxy two components glue but i think it is too old, it doesn't resist. I will try with PVC glue. Could you show me the CO2 shell designed by your son ? Otherwise, i found a thingy witch is cool : my old tube for industrial drawing when a was a student. I think is really similar to the real one.  The real one 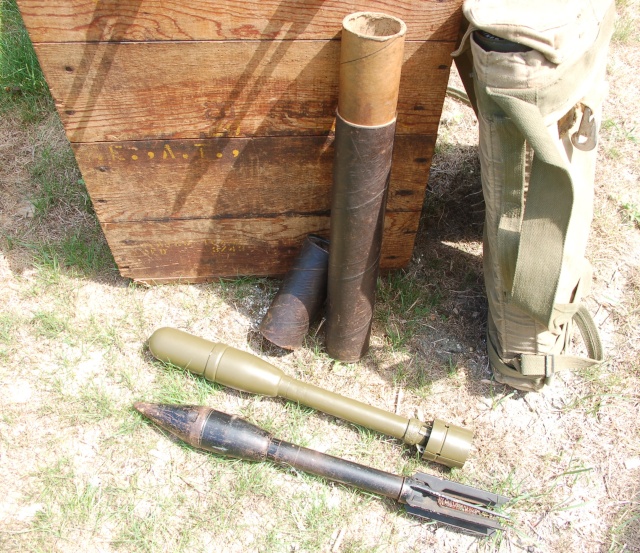 Reste plus qu'à trouver où en acheter. |
|
|
|
Post by insterburger on Jan 1, 2015 10:02:11 GMT -5
Looking good! How do you intend to construct and power the rocket in such a way that it is not a danger to yourself or other players? I would think pyro-based propulsion would be out.
|
|
|
|
Post by droopaille on Jan 1, 2015 12:16:29 GMT -5
At this time and it is not my choice, the manager of the event decides to use something like that, with an electrical firing : www.youtube.com/watch?v=xnzRooVYyIUI 've found something better but i think a bit dangerous. www.youtube.com/watch?v=vlBzrNuPyecIn fact, we are still surching the good solution. The targets will be bunkers and towers, not players. I've made this video to show how to form the PVC with hotgun. I know you had identified the front sight. Normaly complicated piece but not with the PVC. Just have to glue and sculpt to finish it.  |
|
|
|
Post by droopaille on Jan 3, 2015 14:15:17 GMT -5
Today it is a rainy day, i made a lot of work but allready there a lot of think on gluing that i can't show. I make the pieces witch guide the spring on the bolt of rocket and the axle witch was a screw for having a better look.  Making of the trigger and all parts go with it. The connector is missing.     |
|
|
|
Post by kilroysbrother on Jan 3, 2015 19:51:41 GMT -5
How soft can you get the PVC without burning it?
|
|
|
|
Post by droopaille on Jan 4, 2015 5:46:14 GMT -5
i don't have words to describe it but it is really soft. It don't resist at his own weight. You can see in my video that i don't force for bend it.
It will burn if you apply the hot air to quickly, only the "skin" burns.
|
|
|
|
Post by droopaille on Jan 4, 2015 9:19:52 GMT -5
Here is the piece shown on the video (almost) finished.  |
|
|
|
Post by reichelderfer on Jan 4, 2015 10:11:15 GMT -5
You are an inspiration man, thank you for posting this. Great job!
|
|
Dracul
Master sergeant  
Posts: 1,341 
|
Post by Dracul on Jan 4, 2015 11:49:04 GMT -5
Killroy's Brother, or anyone else really, if you look up guides to make your own LARP Bow out of PVC pipe, they will let you know how to "cook" the PVC pipe properly. I've seen it done in person when I was down in Florida, its kind of neat.
|
|
2nd Bat
Master sergeant  
Posts: 11,813
|
Post by 2nd Bat on Jan 4, 2015 16:29:01 GMT -5
I agree. this is very encouraging and opens up all kinds of creative possibilities. Droop, I will get you pictures of my sons Nerf Rocket shell design along with instructions on the build. when inserted into a three foot section on 2 inch pipe (like your bazooka) they fire the nerf rocket well over 200 meters. In line of sight direct fire accurately for 75 meters. At that range you can consistently hit a bunker or stationary vehicle
|
|
|
|
Post by droopaille on Jan 5, 2015 14:06:04 GMT -5
|
|
|
|
Post by droopaille on Jan 9, 2015 17:57:05 GMT -5
I had to increase the thickness of the stock for carving for a mini battery.  Final shape of the stock. Making of the two flange and the curved tube. Blank assembly.  |
|
2nd Bat
Master sergeant  
Posts: 11,813
|
Post by 2nd Bat on Jan 10, 2015 1:18:46 GMT -5
Your battery is going to power what? will it provide juice for a spark to ignite a alchohal or hairspray charge? I am intrigued!
|
|
|
|
Post by droopaille on Jan 10, 2015 3:59:34 GMT -5
It is here in the case of. I had to make the hole before gluing the two sides of the stock.
First i wanted to ignite the fuse of a rocket, may be it will serve to iginite inflammanble gaz. I don't know yet.
Depends of the owner of the field where we will play, he doesn't accept fire, powder and danger for players.
We are in brainstorming.
|
|
|
|
Post by droopaille on Jan 11, 2015 10:24:23 GMT -5
|
|
|
|
Post by droopaille on Jan 11, 2015 14:43:16 GMT -5
I've found what it is with this pic : the barrel reinforcing wire. 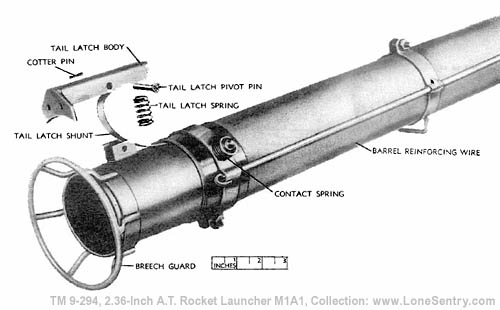 Here is the manual of the bazooka. www.lonesentry.com/manuals/bazooka/index.htmlSo, I start to wind the protective wire but it is a fail, I must go until the mark on the left and I already used 55 yards of wire. I must find bigger spool.  Drill the hole for the light bulb and the circuit cover on the other side.   I made in metal the sling loop and bracket under the handle.  Details of the flanges. I will remake it in metal because one must support the sling and the other must be conductive.  |
|
|
|
Post by droopaille on Jan 18, 2015 12:59:49 GMT -5
I try an other wire in nylon, it is a bit big but it looks ok.   Paint test and it arrives what i thank, it is very difficult to paint the nylon. 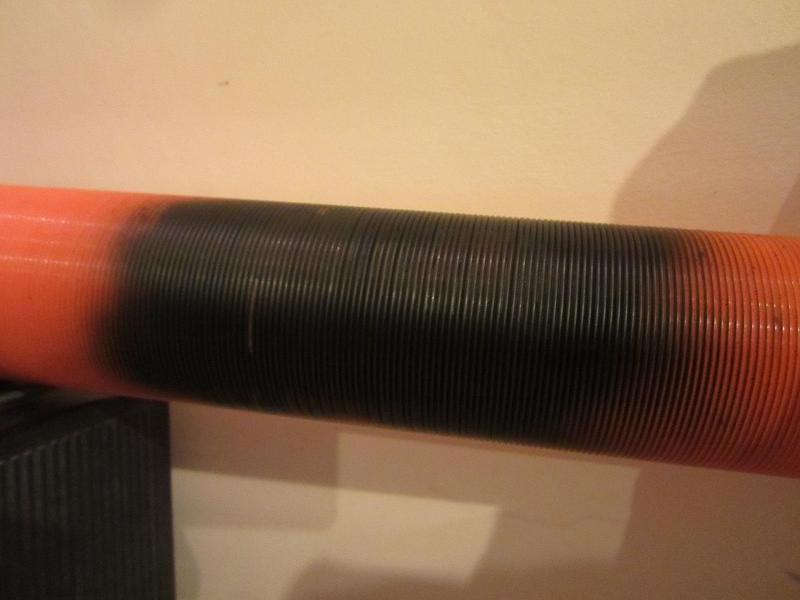 I've received my cardboard tube. I will cut on the good lengh when i will receive the bag.  |
|
|
|
Post by droopaille on Jan 25, 2015 13:54:58 GMT -5
It makes about 15 years when i welded the last time. And it shows.  After cutting, grinding and polishing, it is a bit better.  I made the plate under the stock. Sheets of metal, grinder and hammer.   I have received the ammunition bag. With carboard tube, it looks great.   |
|
2nd Bat
Master sergeant  
Posts: 11,813
|
Post by 2nd Bat on Jan 25, 2015 14:13:30 GMT -5
Fabulous work! There are paints that adhere to plastic and might be a better solution for this project!
|
|
|
|
Post by droopaille on Jan 25, 2015 14:29:46 GMT -5
Thank you
I don't understand your sentence, what do you mean about the paint ?
|
|
stuka
Sergeant
   The one and only
Posts: 1,205
|
Post by stuka on Jan 25, 2015 15:14:41 GMT -5
There are paints that will stick to the plastic.
Here is google translate, I am not sure how it will actually translate.
Il ya des peintures qui se collent au plastique
|
|
|
|
Post by droopaille on Jan 25, 2015 15:41:51 GMT -5
|
|
2nd Bat
Master sergeant  
Posts: 11,813
|
Post by 2nd Bat on Jan 26, 2015 11:56:04 GMT -5
nylon I thought was a synthetic, not unlike plastic?
|
|
|
|
Post by droopaille on Jan 26, 2015 12:59:13 GMT -5
nylon is a kind of plastic like PVC, ABS, PMMA and others
unlike PVC, it is difficult to paint and glue it, but resistant against chemicals
|
|
|
|
Post by droopaille on Feb 1, 2015 13:11:29 GMT -5
Detail of the lock part of the plate. Just a clic on wood.  Cleaning for removing the rust. With paint it will be good. 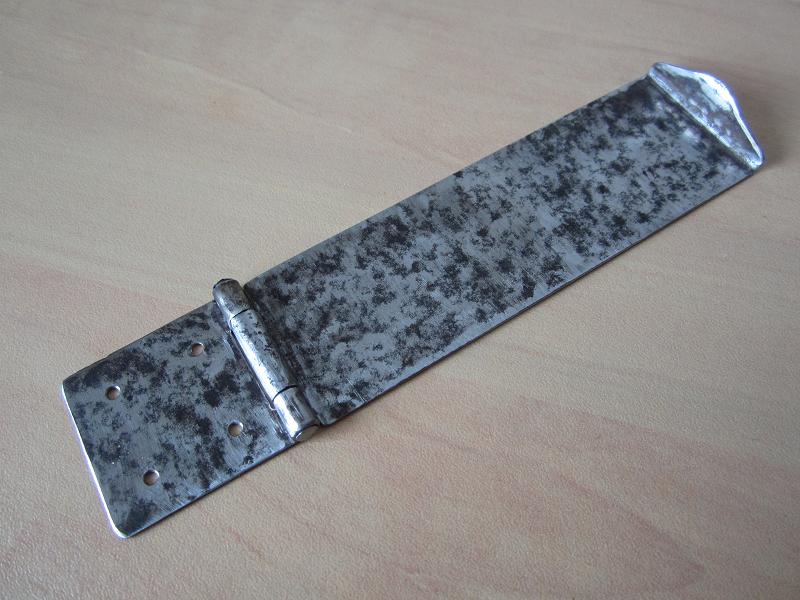 In the same way of the front one, this is the rear sight.  And after the finish.  |
|