indie
Private
Virtoe Via Virtus
Posts: 272
|
Post by indie on Nov 27, 2007 21:43:24 GMT -5
i want a normandy paint scheme for my helmet, but i have no idea who to send it to or how to paint it by myself. and i also want a chicken wire basket on it. any links and/or tips would be greatly appreciated.
|
|
Ersatzjack
Corporal
  "That silly Franz... he thinks we are winning."
Posts: 1,093
|
Post by Ersatzjack on Nov 27, 2007 22:04:11 GMT -5
|
|
Ersatzjack
Corporal
  "That silly Franz... he thinks we are winning."
Posts: 1,093
|
Post by Ersatzjack on Nov 27, 2007 23:36:46 GMT -5
BTW - your question was very topical for me tonight as I finished my own rendition of a Normandy paint scheme for my helmet. I also finished another piece of equipment that I modified to carry my HPA set-up. Here are pictures. The HPA is cushioned against rattle inside the can by foam rubber and don't worry, I just cut up a cheap copy of a gas mask container. As far as the helmet goes, I'm satisfied but still like Flectarn's helmet (posted on Axis Impressions) better. But the research on helmets above gives anyone wanting to do this pretty wide latitude. Afterall it was done by the soldiers in the field and was open to artistic expression.       I'm getting ready for the Bulge in NY. Heh-heh! |
|
|
|
Post by binarypunisher on Nov 27, 2007 23:49:22 GMT -5
Are you wanting an FJ Normandy camo, or SS/Heer Normandy camo? Heres an FJ one:  Just green and yellow. |
|
|
|
Post by neoptolemus on Nov 27, 2007 23:57:45 GMT -5
Frequently, helmets were painted using the pastes issued to vehicle crews to camouflage their tanks.
The colors were Dunkelgelb (Dark Yellow), Rotbraun (Red Brown), and Dunkelgrün (Dark Green).
The paste itself was highly concentrated and was diluted by the crew who then painted the vehicle using a compressor in the field.
For the landser, this means you can have a variety of shades appear on the helmet. In regards to application, I would assume that using a brush was the most common, but I am sure photo support will show a variety of methods were used.
As far as painting it goes, you could do a couple of things:
-If you have access to an airbrush, you are in an excellent situation! Airbrushes are great for painting just about anything which requires changing paint shades and tight control. However, if you have an airbrush you probably won't be asking for help in the first place!
-Spray cans. I have used home/garden variety paints in the paste for painting odds and ends which didn't need anything specific, but for German colors, I'd recommend Tamiya brand paints. Specifically, "Dark Yellow", "Dark Green", and "Red Brown". Because their cans are acrylics (water based), you will also need a dull coat to "seal" the paint job and prevent it from running in the field.
The real paints used I think were oil based however, so you might be better of with an enamel spray paint (which I have no experience with!).
-Finally, you could use a brush. There are all sorts of brushes available, but, I think a sponge brush (using either an acrylic or enamel paint) would do an excellent job giving the helmet a sort of "weathered" look. You could then mix the paints with a lighter shade and give it another coat for a highlighted effect!
I think any of the aforementioned methods should work fine. Make sure you practice on scrap metal beforehand though to get a feel for the techniques and to come up with a desired effect!
|
|
Adler69
Master sergeant   Legio Patria Nostra
Posts: 2,859
|
Post by Adler69 on Nov 28, 2007 0:56:35 GMT -5
|
|
|
|
Post by Jager.Drü on Nov 28, 2007 3:55:54 GMT -5
Not to be rude but that looks like a WWI helmet. No "Normandy" camo pattern looked like that. You gave links to some, did you look at them? You need to go and get the following paints. (1)Model Master 1910 Dark Green (FS34079) Custom Spray enamel (2)Model Master 1942 Dark Tan (FS30219) Custom Spray enamel (3)Model Master 1954 Light Earth (FS30140) Custom Spray enamel (4)Model Master 1955 Afrika Mustard (FS32066) Custom Spray enamel These will yield the correct color comb for the 4 color Heer/SS. Do a couple base coats of Afrika Mustard. Then lines of Dark Green. Then hits of Light Earth and Dark tan. If you want texture add it to the base coats. If no texture do only one base coat. Also paint over the decals. |
|
Ersatzjack
Corporal
  "That silly Franz... he thinks we are winning."
Posts: 1,093
|
Post by Ersatzjack on Nov 28, 2007 9:30:22 GMT -5
Jager - Yep! You're right. I slept on it and decided I don't like it. Couldn't put my finger on it but just didn't like how it was turning out. Thanks for the suggestions and I'll see what they yield in the second try. Back to the drawing board. I liked all the other diplomatic feedback from others as well.  |
|
KRaddatz
Private 1st Class
 505th
505th
Posts: 589
|
Post by KRaddatz on Nov 28, 2007 9:32:26 GMT -5
I think maybe the light brownish color looks too "peachish" maybe try a darker one for a better look, i lovethe pattern though
|
|
|
|
Post by neoptolemus on Nov 28, 2007 15:30:46 GMT -5
Correct me if I'm wrong, but wouldn't helmets only have 3 colors at most? Of course they could be thinned to varying degrees to get different shades, but I don't think they would have 4 colors.
|
|
Ersatzjack
Corporal
  "That silly Franz... he thinks we are winning."
Posts: 1,093
|
Post by Ersatzjack on Nov 28, 2007 17:08:49 GMT -5
I guess that 4-color, 3-color debate will have to go on without me. I lost interest in the Normandy scheme altogether when Jager said no decal. I can't... and won't give up my decal. Another reason is that here in Wisconsin I foresee many of our future events against Russian oppostion (those wily 198th Rifle Division under BA64 and Gryphon's leadership) so I want a paint scheme that will work for both theatre's. Nope - I am back to slate gray and dark green for my next attempt. I plan on keeping the wire though. Stay tuned.
|
|
|
|
Post by binarypunisher on Nov 28, 2007 18:16:38 GMT -5
You cant give up your decal?
|
|
|
|
Post by neoptolemus on Nov 28, 2007 18:37:14 GMT -5
You could simply mask it with a piece of burlap or cloth.
That way, you would keep the decal, but it would be more realistic than having it applied to the helmet post-camouflaging.
|
|
|
|
Post by Jager.Drü on Nov 28, 2007 19:29:18 GMT -5
Mud would work for both Ost and Westen battles. Cake it on, make your feldgrau helmet brown with mud.
|
|
Ersatzjack
Corporal
  "That silly Franz... he thinks we are winning."
Posts: 1,093
|
Post by Ersatzjack on Nov 28, 2007 20:05:39 GMT -5
Mud would work for both Ost and Western battles. Cake it on, make your feldgrau helmet brown with mud. Well - then I'll have to settle for both fronts then ;D. I finished the redo and used this as my inspiration. www.german-helmets.com/Camouflage%20Period%20Photos.htmThe slumping and napping soldier most closely resembles me on guard duty so I picked him. Here is the same helmet as above one day later:   Oh - to save the decal I used Royal Crown Pomade. Just paint it on. Works better than it does as a hair dressing. To answer BP, I like the look of the decal. Let's face it, when we see people wearing helmets we always look for unit decals. It's just neat to figure out who is who by their helmet decal. I see lots of pictures where the decals were painted around and I figure it is because the unit wanted to keep that symbol visible as a source of unit pride. Alder69 - your helmets are very nicely done. Thanks for posting pics. Thanks for all the input from all parties. |
|
|
|
Post by Jager.Drü on Nov 28, 2007 20:16:01 GMT -5
I think it looks a lot better. What I would do is take the wire off and roll the helmet on the gound. So it doesn't look brand new, then put the wire back on.
Personaly that just looks like dirt/mud to me not done with paint.
|
|
Adler69
Master sergeant   Legio Patria Nostra
Posts: 2,859
|
Post by Adler69 on Nov 28, 2007 22:26:03 GMT -5
Ersatzjack , if i was going to cover my helmet in mud , i would get some dirt in a small bucket , add water and make a nice thick mix of mud , then cover the helmet in a heavy coat , let it dry for a few hours and then add another heavy coat , the good thing about mud is that you can take it off anytime. Here are two pics of Fallschirmjager with mud on their helmets This one is on the Ost Front , notice that he didn't cover the entire helmet , and some of it has run off in the rain , but you can see how heavy the coat of mud he applied to it is.  This one is from the Italian Front and most of the mud has come off his helmet but you get the idea of how heavy the coat of mud used to be.  |
|
Ersatzjack
Corporal
  "That silly Franz... he thinks we are winning."
Posts: 1,093
|
Post by Ersatzjack on Nov 29, 2007 3:52:10 GMT -5
Alder69 - I'm not going to wear a lump of mud on my head. Nice try though.  My brother thought it was too tan and I agreed so here is my final version. I like it so I'll live with it. I'm finding out that helmet painting is really hard. You've got to respect what Grigsby Militaria is doing.   |
|
|
|
Post by Ripper on Nov 29, 2007 8:11:58 GMT -5
If you are trying to simulate the look of mud being smeared on the helmet, maybe a few strokes of the paint OVER the chicken wire would make it look more like a hasty application. I thought the lighter version looked better myself since mud tends to dry lighter rather than darker. But the overall effect is still good.
Using a flat tan latex house paint lightly drybrushed over the helmet could also give you a little bit of buildup and texture to look like daubed on mud.
|
|
Ersatzjack
Corporal
  "That silly Franz... he thinks we are winning."
Posts: 1,093
|
Post by Ersatzjack on Nov 29, 2007 10:52:37 GMT -5
Awright - after the paint dries and it gets a coat of dullcoat here are the final pictures. Love them or leave them. The pictures don't do justice to the look but they are all I have. For some reason the flash changes the appearance but under normal light the stalhelm looks just about perfect minus the normal wear an tear which will come.   |
|
|
|
Post by binarypunisher on Nov 29, 2007 11:02:49 GMT -5
I still think it would look better sans decal.
|
|
|
|
Post by Jager.Drü on Nov 29, 2007 15:46:56 GMT -5
FJ is two color Normandy camo. Tan and Green. It can be textured or not. But Most are. Also most Two colors are from FJR6 3/4 color. Done in the same colors as vehicles. So Mechinzed troops could get a hold of paint that their halftrack/tank/Kuble/ insert vehicle painted here. Mostly done as a unit, either sprayed on or brushed. If vehicles are being painted the helmets would sneak in there too. Mostly Heer/SS panzergreniders have 3/4 colors. Normandy camo starts with a tan base and builds on top of that. For every FJ and Heer/SS Here is FJ two color being done, with textrue. 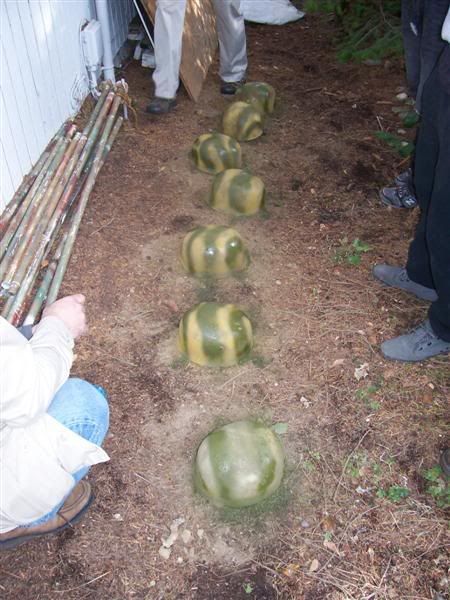 |
|
|
|
Post by neoptolemus on Nov 29, 2007 23:48:40 GMT -5
There is no 4th color.
as mentioned above, the colors given to the armored sections were:
"Dunkelgelb (Dark Yellow), Rotbraun (Red Brown), and Dunkelgrün (Dark Green)".
Also, the 3 color pastes were mainly issued from 1943-1944. Following that, factories were supposed to begin applying a hard edged scheme like hinterhalt (ambush).
The only other colors produced were Dunkelgrau and various colors for Africa. The Africa shades however were no longer issued after 1942 and even then saw shortages.
|
|
|
|
Post by mikkel on Nov 30, 2007 11:22:49 GMT -5
RAL 8017 (Rotbraun/Schokoladenbraun) + RAL 6003 (Olivgrün) + RAL 7028 (Dunkelgelb).
|
|
|
|
Post by Jager.Drü on Nov 30, 2007 12:30:07 GMT -5
The thing is with paint to can mix them to make different colors! Wow. Also the would thin the paste with gasoline or even motor oil. Using those two things will change colors. I don't disagree that there are 3 things of paste. But you can yield different colors. Thats where the 4 color comes in. The mixing of paints and the thining medium.
|
|
|
|
Post by flectarn on Dec 8, 2007 22:55:44 GMT -5
i13.photobucket.com/albums/a264/Guy on a short busEDED77/100_0356.jpg My helmet was professionaly done by www.alexanderandsonsrestorations.com (I know, long huh?). It was a copy of a helmet found in the general area of where the 21st panzer division was fighting. If you want that exact pattern and you are willing to shell out cash for an original restored helmet, let me know; I remember what the pattern is called.
|
|
indie
Private
Virtoe Via Virtus
Posts: 272
|
Post by indie on Dec 8, 2007 23:06:04 GMT -5
that looks great. does anybody have any advice on what size of helmet to get? i found out i'd need a 68, but my hat size is 7 1/2, so what do you guys recommend? i know size 68 is hard to come by, so i'm at a loss.
|
|
|
|
Post by Jager.Drü on Dec 10, 2007 2:43:39 GMT -5
I'll paint your helmet for $60. To cover cost of paints and shipping back and forth.
|
|
gadge
Corporal
 
Posts: 1,199
|
Post by gadge on Dec 23, 2007 3:59:27 GMT -5
Colours vary as said depends on what was used to pain them, wasnt always whermacht paint, sometimes captured stocks were used. Also the compressed paints that came wiht vehicles vary depending on what you mix them with (petrol or water) and in what ratio. You cant really say there is a *right* way as any soldier with the time could do it his own way if he wanted and had access to paint of some sort (i've seen a stug painted in picasso/cubists designs and that didnt happen according to the books) I based my lid cam on pictures of original whermacht ones but some people will tell you this scheme wasnt used by the whermacht in Normandy when it quite blatantly was... 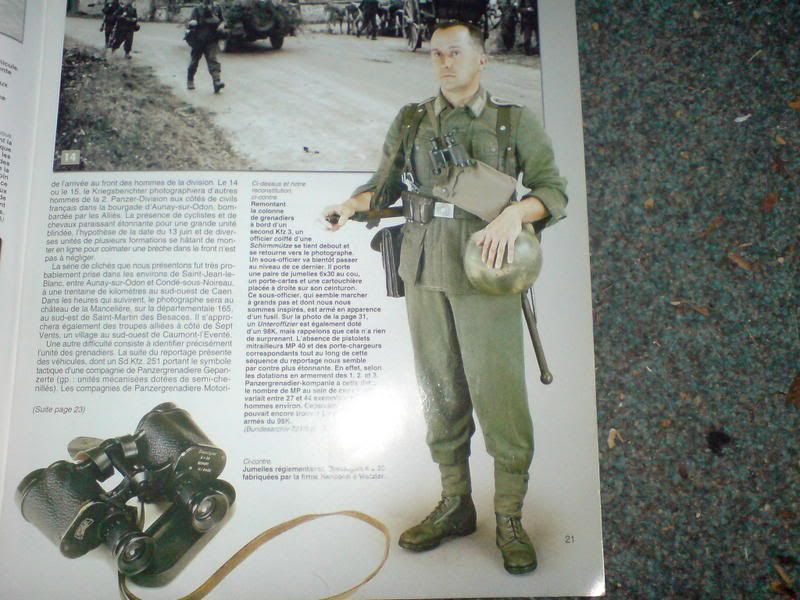 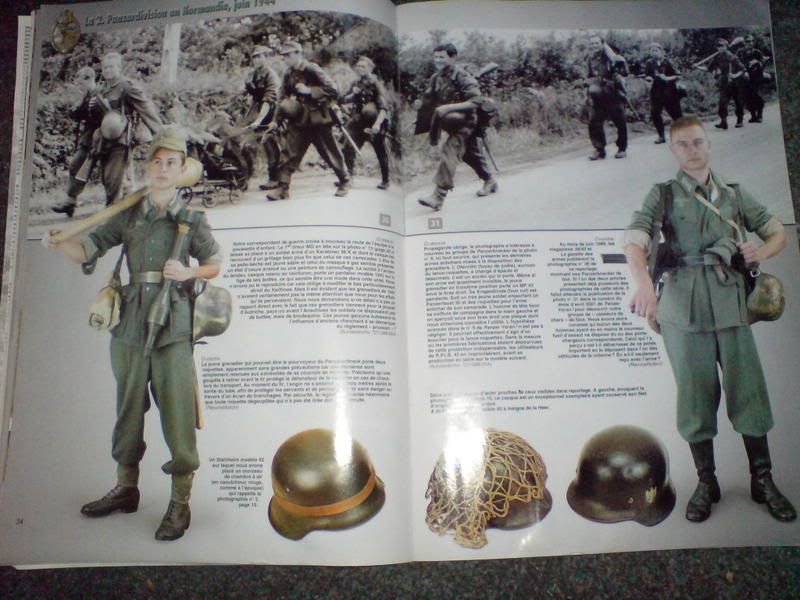 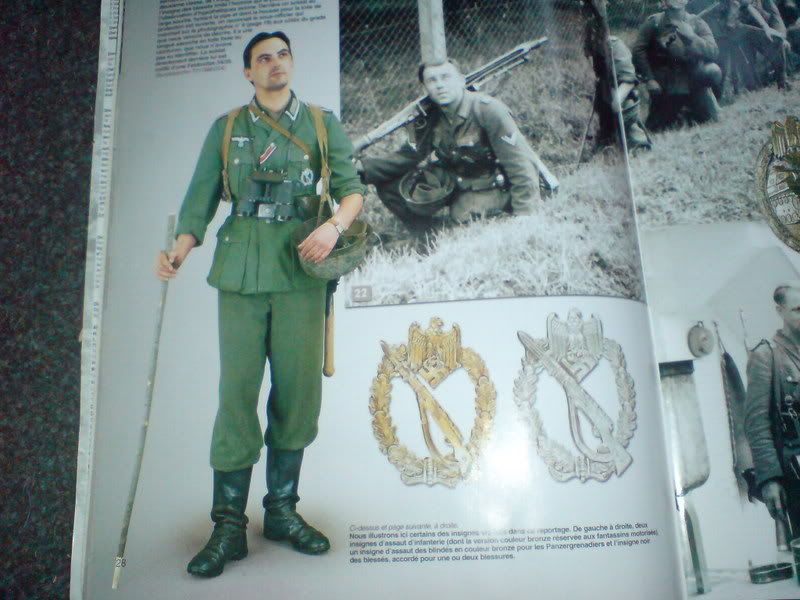 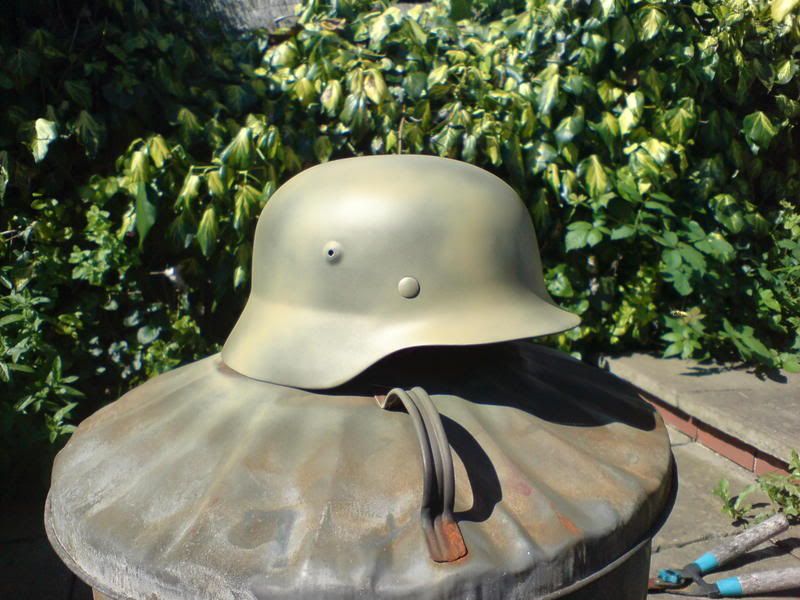  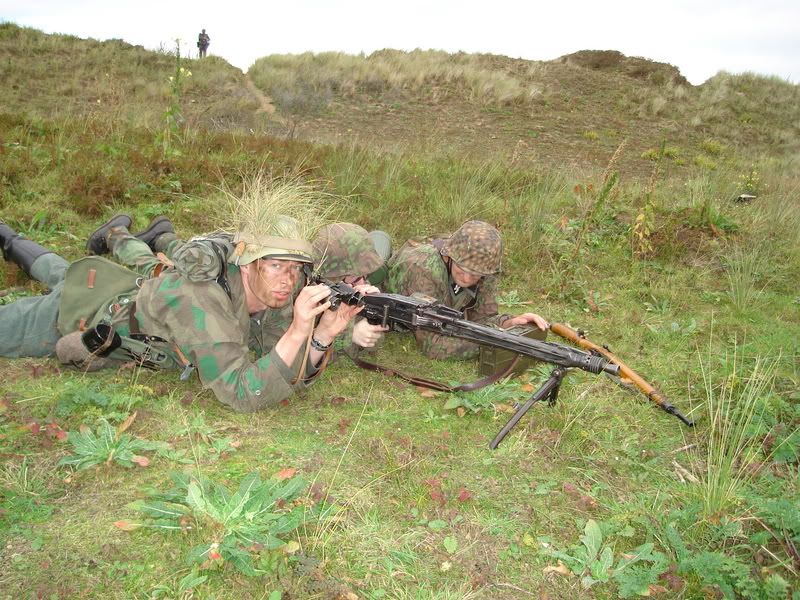 |
|
|
|
Post by binarypunisher on Dec 23, 2007 4:14:52 GMT -5
Yeah, the problem with German stuff is there an exception to nearly every rule.
Quick question, what book is that?
Does it say that the helmets are original paint job?
|
|